
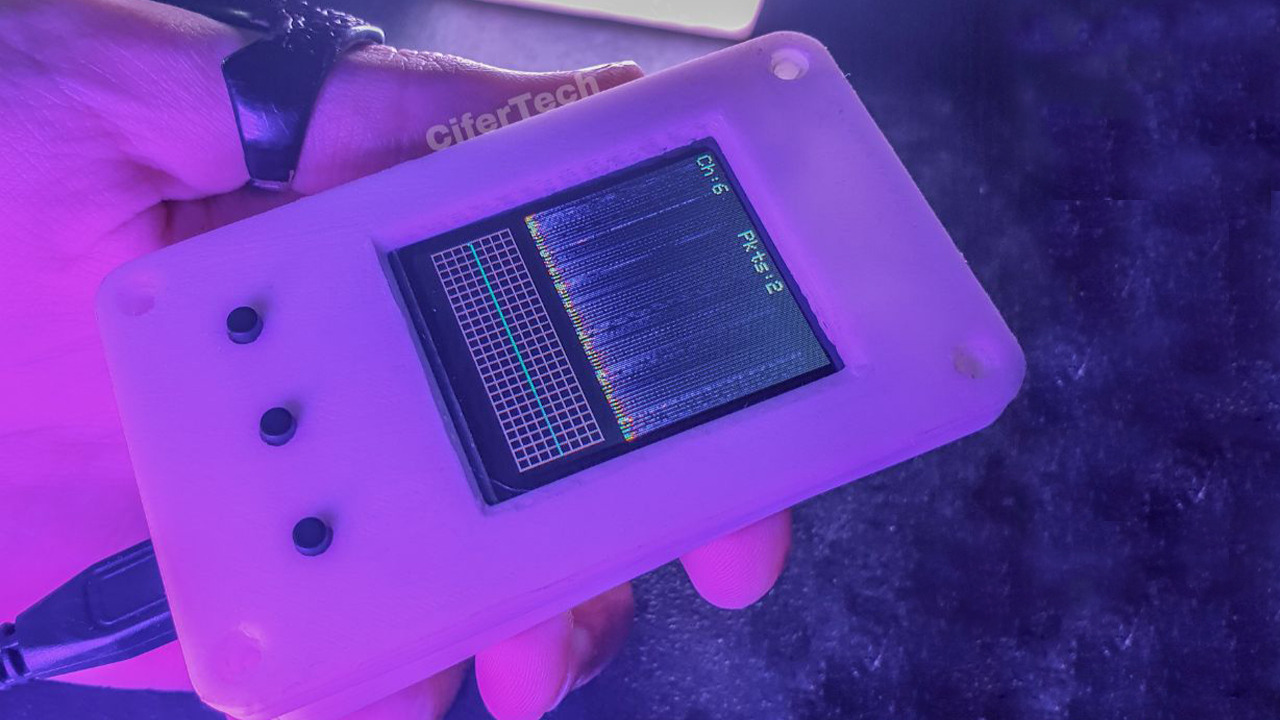
In this project, we will be building a packet monitor using an ESP32 microcontroller and a TFT display ST7735. The packet monitor will capture the packets that are being transmitted over a specific frequency and display them in a waterfall graph on the TFT display. This project is great for those who are interested in learning about wireless communication and network analysis. The traffic values in the channel specified from 1 to 14 are received and displayed with the help of ESP32, and TFT Lcd. graphically in the form of incoming traffic at any time will show with Waterfall Plot.
🎯 Features
- × Scan 2.4Ghz band
- × Received Packets will show with Waterfall Plot.
- × Ability to choose the desired channel from 14 channels
🧰 Getting Started
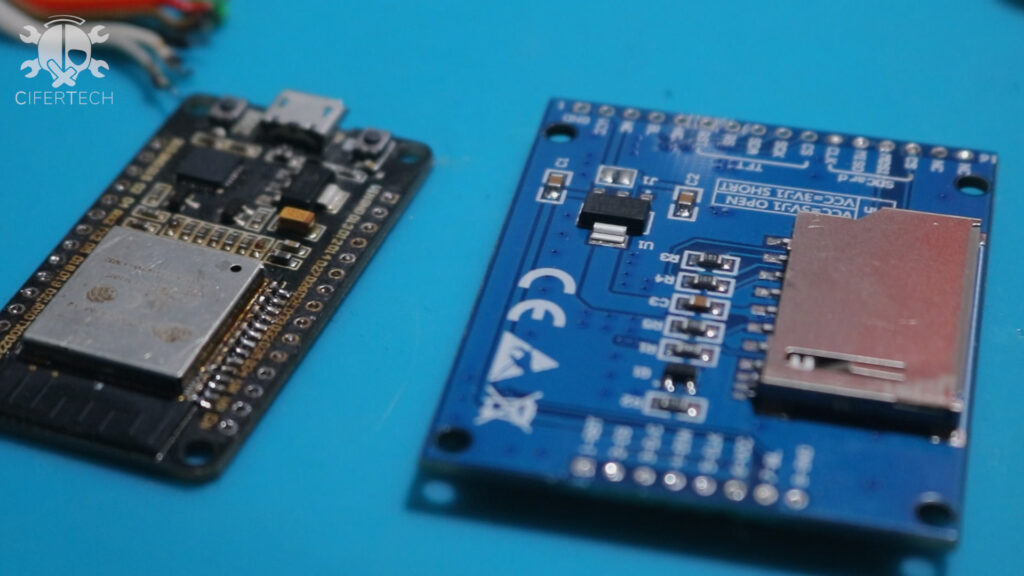
Gather Materials: The first step in building our packet monitor is to gather the necessary materials. You will need an ESP32 microcontroller, a TFT display ST7735, a breadboard, and some jump wires. These components can be purchased online or at an electronics store.
We use st7735 Tft Lcd with ESP32. Also, I used a MicroSwitch in order to change 802.11 channels.
- – TFT Lcd st7735
- – ESP32
- – Micro Switch
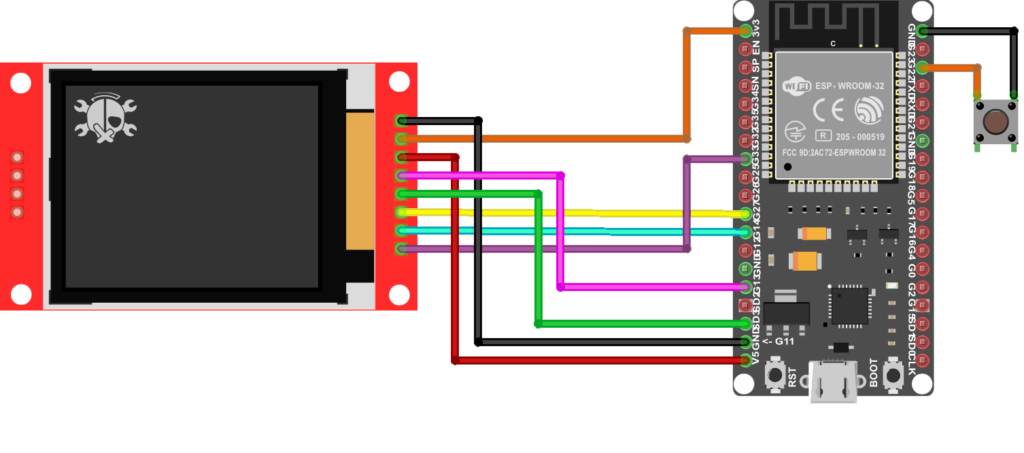
🔌 Schematic
Connect Hardware: Once you have all the necessary materials, the next step is to connect the hardware. Connect the ESP32 to the breadboard and then connect the TFT display ST7735 to the ESP32.
Make the connections according to the table and schematic below.
| ESP32 and ST7735 TFT LCD | |
|---|---|
| ESP32 | TFT Lcd |
| 14 | CS |
| 33 | RST |
| 27 | DC |
| 18 | CLK |
| 23 | DIN |
| 5V | VCC |
| 3V3 | LED |
| GND | GND |
| ESP32 and Micro Switch | |
|---|---|
| ESP32 | Micro Switch |
| 22 | – |
- – Complete Schematic
⚙️ Installation
Configure Software: The next step is to set up the software environment and upload the code to the ESP32. You will need to install the Arduino IDE and the necessary libraries for the ESP32 and TFT display ST7735. Once you have the software set up, you can upload the code to the ESP32 using a USB cable.
Before uploading the code you need to install ESP32 in your Arduino IDE
- – In Arduino IDE, go to File > Preferences
- – Enter URLs Additional Boards Manager URLs field. Then, click the “OK”
|
1 |
https://dl.espressif.com/dl/package_esp32_index.json |
Then you need to install the required library in Arduino IDE. Follow these steps:
- – Follow this path Sketch> Include Library> Manage Libraries
- – Search for Adafruit_ST7735
- – Install the library
👀 Usage
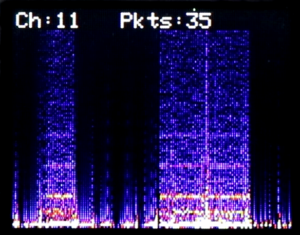
Capture Packets: Now that the hardware and software are set up, you can start capturing packets. The ESP32 will scan for packets on a specific frequency and display them on the TFT display in a waterfall graph. After uploading the code, According to the channel selected by you, the packet monitor will display the received traffic.
![]()
Code
If you’re interested in building this project on your own, the code is available on GitHub. Simply go to the GitHub repository, download the code and upload it to your ESP32.
GitHub repository: https://github.com/cifertech/WiFiBox
Test and Troubleshoot: Once you have completed all the steps, it’s time to test the project. Make sure that the ESP32 is capturing packets and that they are being displayed on the TFT display in a waterfall graph. If you encounter any issues, you can troubleshoot using the software’s debugging tools.
Conclusion: Building a packet monitor is a fun and educational project that can help you learn more about wireless communication and network analysis. With the help of an ESP32 and a TFT display ST7735, you can create a low-cost and powerful packet monitor that can be used for a variety of applications. Remember to always double-check your connections and make sure that you have the correct libraries and software installed.