
In the construction of robots, especially mini-robots whose purpose is to interact with humans, the face of the robot is an important part of this project, which increases the interaction several times. In this tutorial, I will teach you how to do this with Oled displays for your robot. Visit CiferTech for more tutorials, and be sure to follow my Instagram page to support me.
Description of Project
In this project, by designing images as face mimics for the robot, we will display these designed items using a microcontroller and, of course, an Oled display. Also, we will be able to add animation to this face by making frame-by-frame of each facial expression. In fact, we first design the images with Photoshop, then the images will be converted into comprehensible codes for our micro and display with the help of the software that will be introduced later. In this way, we will be able to add creativity and a new effect to our projects.
What is an OLED display?
OLED displays work without a backlight, so they can display deep black levels. Its size and weight are small compared to liquid crystal displays. OLED displays powered by SSD1306 driver IC. The SSD1306 is a CMOS OLED driver with a controller for a dot matrix graphics display system. Also, due to the use of the SSD1306 driver, the number of required external parts and power consumption has been reduced.
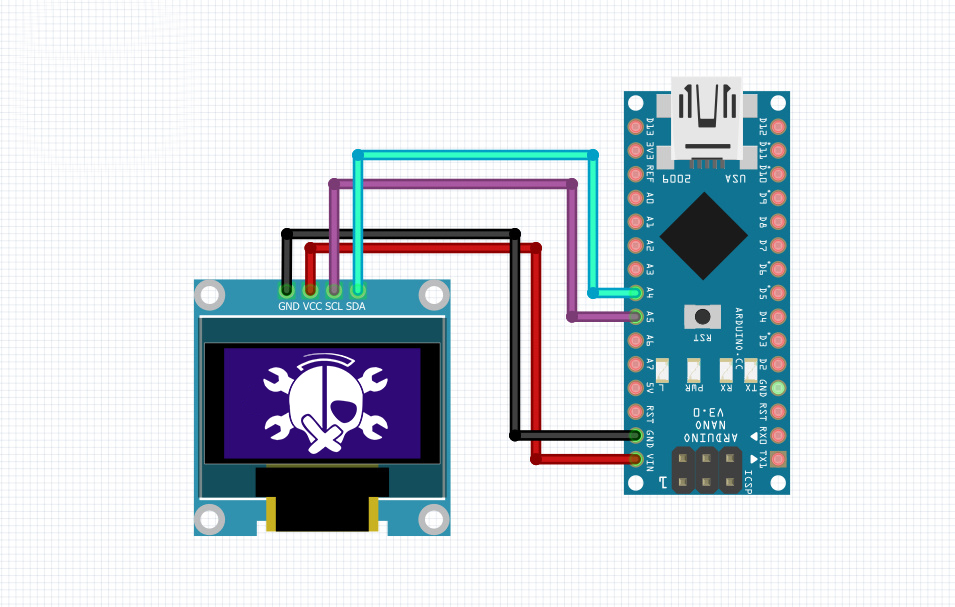
Schematic
To connect the Arduino board and the OLED display, we need the i2c pins in the Arduino, and the A5 and A4 pins are used for this purpose. We will also use the 5v and gnd output of the Arduino board for the power supply.
Robot face design
- To design the desired design, we will first create a file in Photoshop according to the size of the Oled display, which in this project will be 128 x 64. For example, the following image:

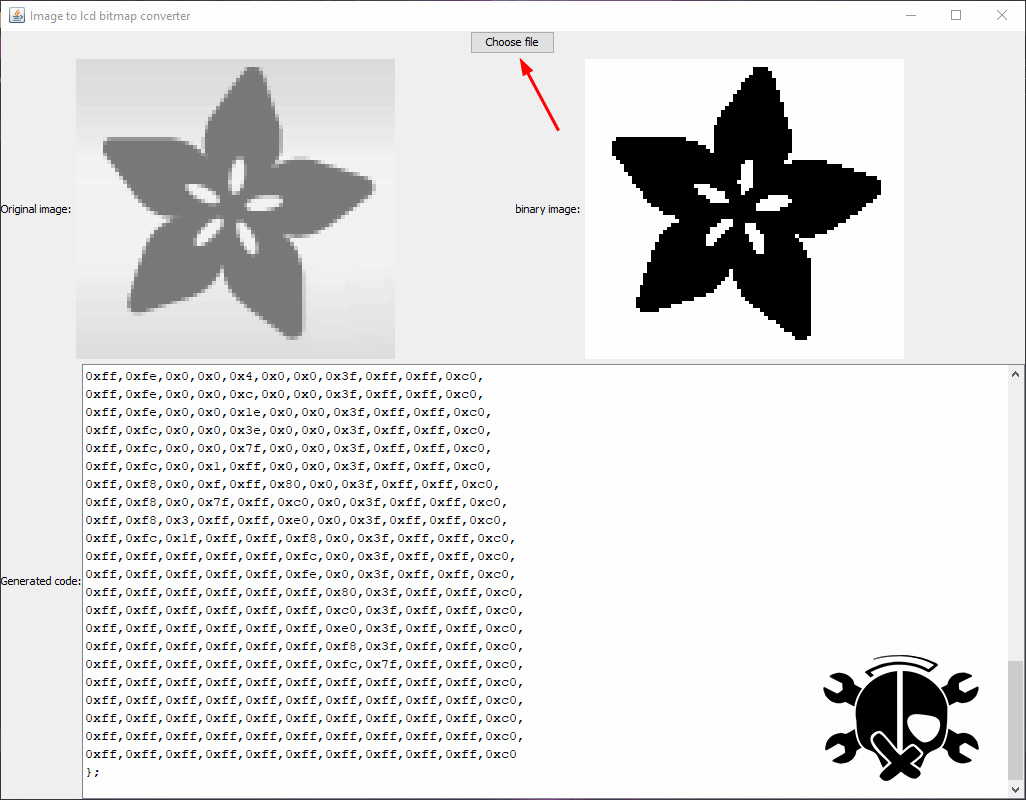
- Then we save the design in .bmp format.

- In the next step, using this software, we convert the saved files into understandable codes for the microcontroller.
Upload the codes in Arduino
After converting the images into code, it is time to display them on the screen, and the functions we have provided us with this possibility easily. In this part of the code, with the settings I applied before, the desired image will be displayed easily.
|
1 2 3 4 |
display.clearDisplay(); display.drawBitmap(0, (32 - (ImageHeight1 / 2)), Array Name , ImageWidth1, ImageHeight1, 1); display.display(); delay(50); |
In the “array name” section, the name that is in the eye.h file must be entered as the image code that we defined earlier. For example, in the code below, the name of the array “ImageArray1” was introduced, so this name will be entered in the above function to display the desired image.
|
1 2 3 4 5 6 7 8 9 10 |
static const unsigned char PROGMEM ImageArray1[] = { 0x0,0x0,0x0,0x0,0x0,0x0,0x0,0x0,0x0,0x0,0x0,0x0,0x0,0x0,0x0,0x0, 0x0,0x0,0x0,0x0,0x0,0x0,0x0,0x0,0x0,0x0,0x0,0x0,0x0,0x0,0x0,0x0, 0x0,0x0,0x0,0x0,0x0,0x0,0x0,0x0,0x0,0x0,0x0,0x0,0x0,0x0,0x0,0x0, 0x0,0x0,0x0,0x0,0x0,0x0,0x0,0x0,0x0,0x0,0x0,0x0,0x0,0x0,0x0,0x0, 0x0,0x0,0x0,0x0,0x0,0x0,0x0,0x0,0x0,0x0,0x0,0x0,0x0,0x0,0x0,0x0, 0x0,0x0,0x0,0x0,0x0,0x0,0x0,0x0,0x0,0x0,0x0,0x0,0x0,0x0,0x0,0x0, 0x0,0x0,0x0,0x0,0x0,0x0,0x0,0x0,0x0,0x0,0x0,0x0,0x0,0x0,0x0,0x0, }; |
Codes of this project for Arduino
|
1 2 3 4 5 6 7 8 9 10 11 12 13 14 15 16 17 18 19 20 21 22 23 24 25 26 27 28 29 30 31 32 33 34 35 36 37 38 |
#include <SPI.h> #include <Wire.h> #include <Adafruit_GFX.h> #include <Adafruit_SH1106.h> #include "EYE.h" #define OLED_RESET 4 Adafruit_SH1106 display(4); #define NUMFLAKES 10 #define XPOS 0 #define YPOS 0 #define DELTAY 2 #define ImageHeight1 64 #define ImageWidth1 128 void setup() { Serial.begin(9600); display.begin(SH1106_SWITCHCAPVCC, 0x3C); // initialize with the I2C addr 0x3D (for the 128x64) display.clearDisplay(); delay(4000); } void loop() { display.clearDisplay(); display.drawBitmap(0, (32 - (ImageHeight1 / 2)), ImageArray9, ImageWidth1, ImageHeight1, 1); display.display(); delay(50); } |
The last word with the Cifer
We can use the idea of this project for various projects, from displaying the logo in our project to making animation, if you have an idea for this project, tell me in the comments and we will write the complete tutorial for you.