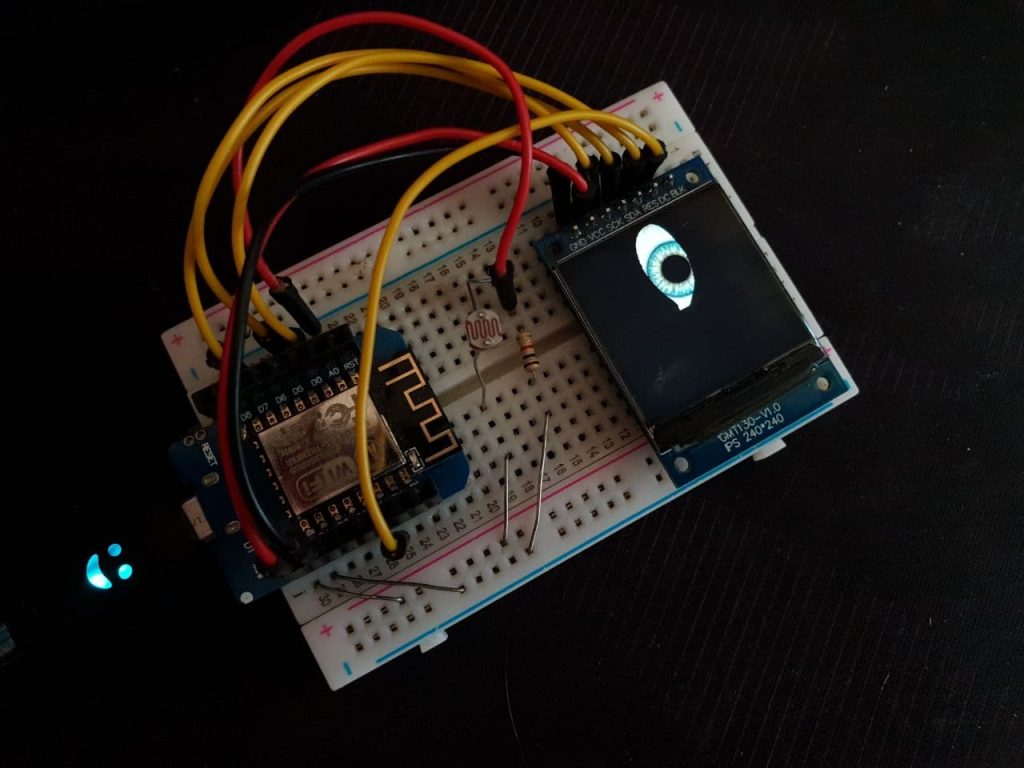
In this tutorial, we are going to launch a kind of TFT LCD with St7789 driver, as a result of which we will be able to show an interesting animation that simulates the function of the human eye. Of course, I will teach you how to change the type of eye animation. In this project, we will use the Wemos board with ESP8266 chip to set up the TFT display, the used TFT display with dimensions of 240 x 240, which due to its full color, contributes a lot to the beauty of the project. We will use the TFT-eSPI library to set up and display graphic items, but we will also make changes to the library to make it suitable for ESP8266 use. Visit CiferTech for more tutorials, and be sure to follow my Instagram page to support me. ^-^
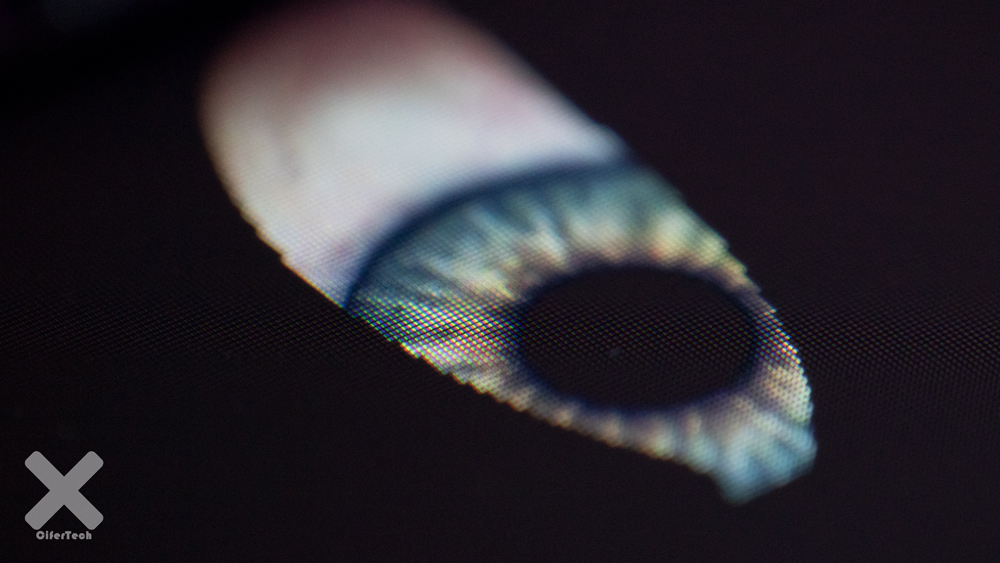
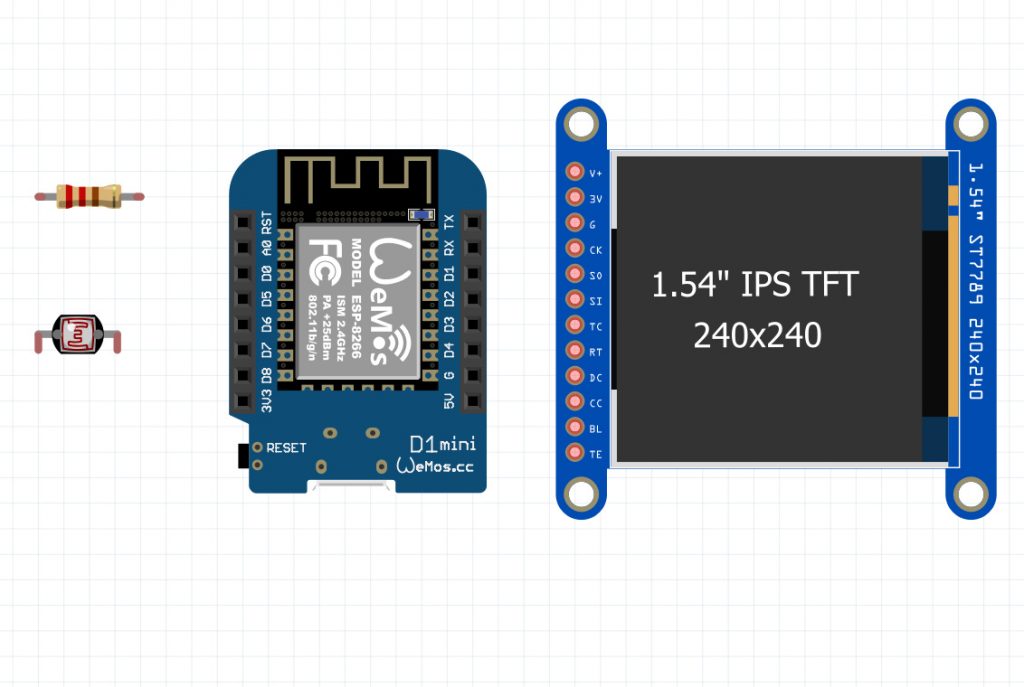
240 × 240 TFT LCD display
In the human eye project, we use TFT LCD, which stands for “Thin Film Transistor”. The color TFT LCD display has transistors made of amorphous silicon thin films deposited on the glass. It acts as a control valve to generate the proper voltage on the liquid crystals for separate sub-pixels. For this reason, the TFT LCD screen is also called the Active Matrix display. The 1.54-inch display has 240×240 pixels, 16-bit full color, and an IPS display, so the color looks great up to 80 degrees from the axis in any direction. This LCD uses the ST7789 driver.

Wemos
Wemos board is one of the most popular boards used in the field of iot, one of the advantages of this board compared to boards such as Node MCU is its small size. The Wi-Fi chip used in this board is ESP8266. Another advantage of this board is the existence of various shields for this board, which makes any project very easy and enjoyable for the user, shields such as battery shield, multi sensor, DHT22, relay, oled, a large number Shield has been developed for this board, which will leave you with a good iot experience.
Light-dependent resistor or LDR
Light Dependent Resistor or Photoresistor, which is a passive or passive electronic component, is actually a resistor whose resistance value varies depending on the intensity of the light. LDR is a resistor made of a high-resistance semiconductor that absorbs photons, and based on the quantity and frequency of absorbed photons, the semiconductor material gives the bound electrons enough energy to conduct. The free electrons conduct the resulting electricity, thereby reducing light resistance. The total number of these electrons depends on the frequency of the existing photons. The amount of LDR resistance in the dark is very high, which will reach almost 1MΩ, but when light falls on the LDR, the resistance decreases by a few KΩ, although this value also depends on the optical resistance model.
Additional explanation
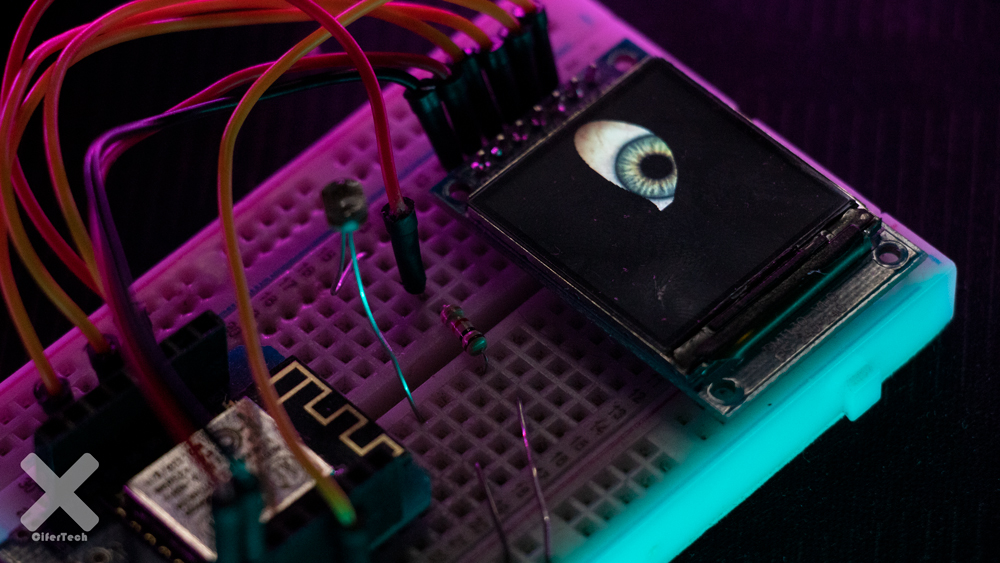
In this project, using the ESP8266 board, we will set up the ST7789 display with the aim of displaying the desired animation, and we will also be able to change the type of eye animation, and then add a light resistor to the circuit to make the animation type more natural. In this case, the amount of ambient light is measured by light resistance, and then the pupil of this eye will change in a certain period of time due to light changes. This project can be used for cases that require personalization of the robot.
Items needed
- Nodemcu board based on ESP8266
- 240 x 240 TFT display
- LDR light dependent resistance
Library installation
In this project, we use the TFT-eSPI library to set up the monitor. However, in order to be able to connect the monitor to the ESP8266 board, we must make changes in the library by replacing one of the files in the main folder. In this step, follow the steps below for the initial installation of the library. First, we install the TFT-eSPI sensor reference library in Arduino IDE software. Follow these steps:
- Follow this path Sketch> Include Library> Manage Libraries
- Search for the word TFT-eSPI.
- Install the library.
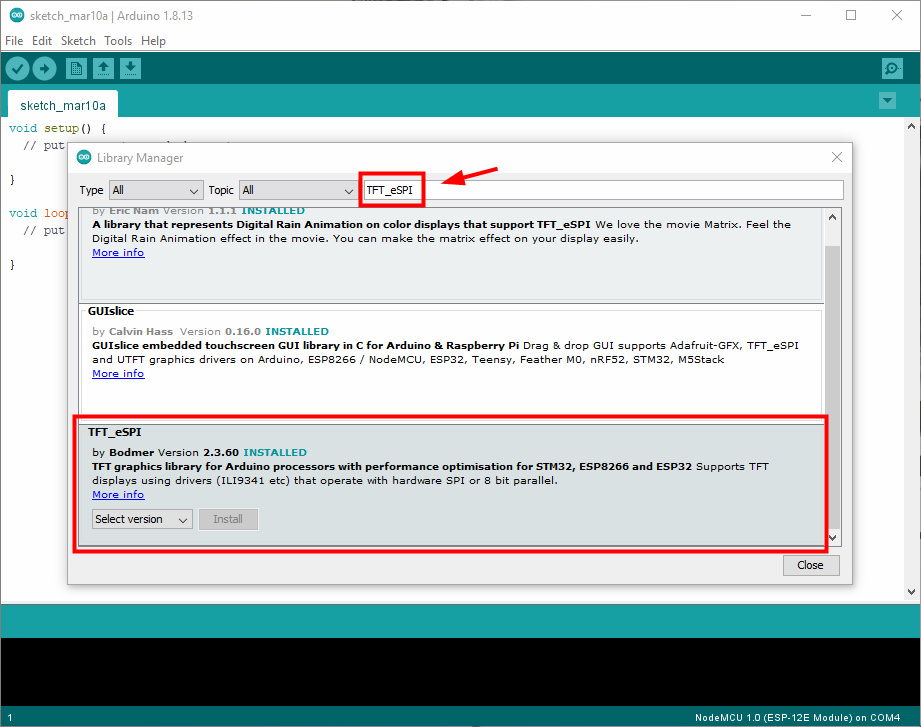
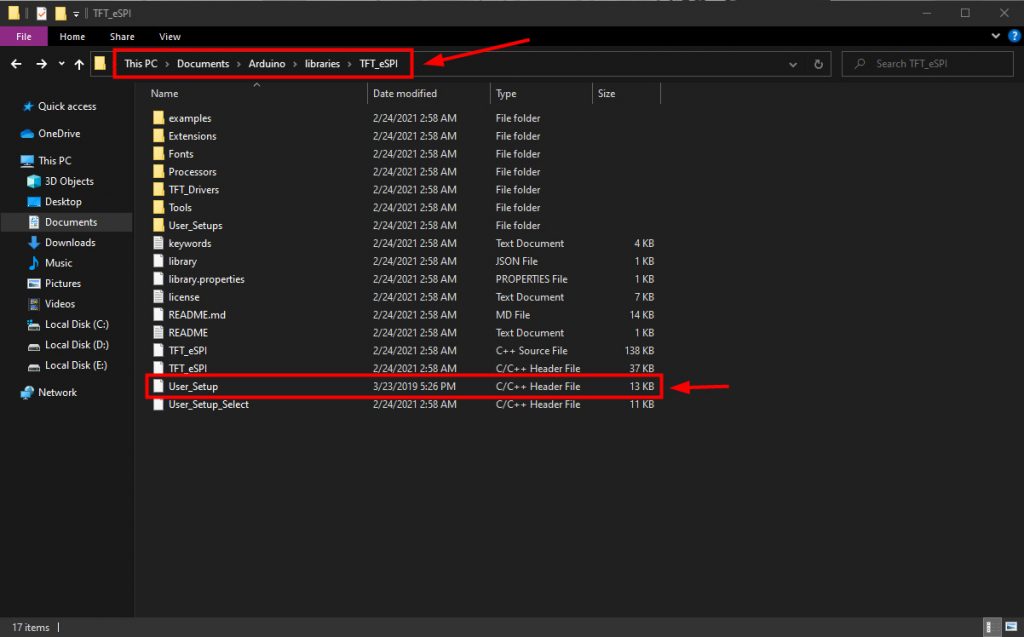
Next, to configure the screen, we need to modify User_Setup.h inside the library.
- Navigate to the library installation path in Documents / Arduino / libraries.
- Download the User_Setup.h file from this link and replace the existing file with the same name.
Connections and setup
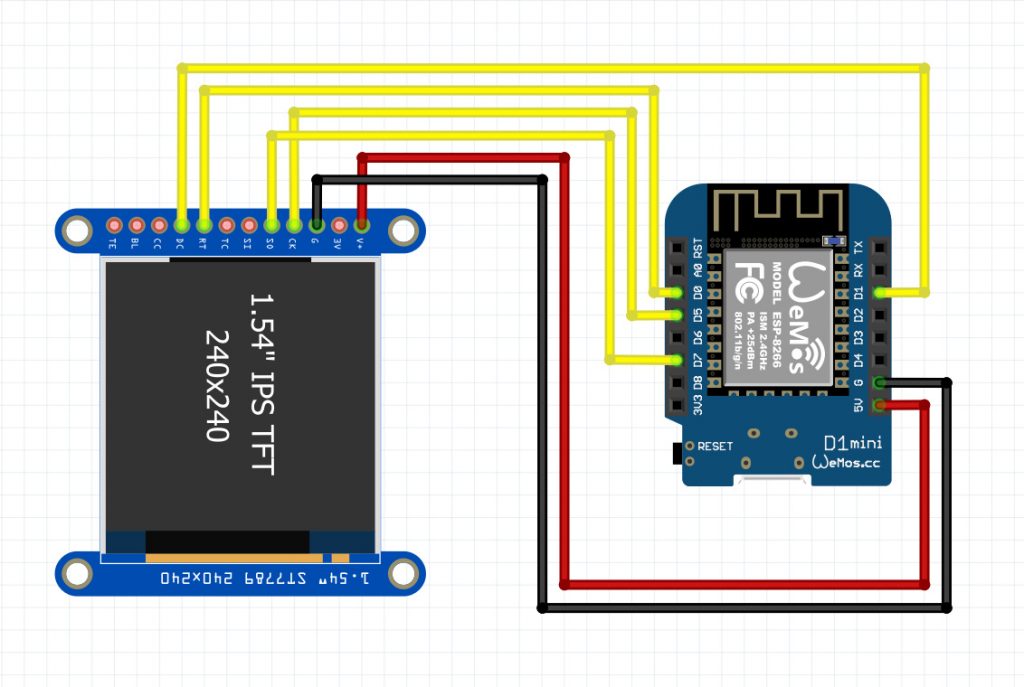
In this project, we used a TFT LCD or SPI communication protocol that will use pins D0, D1, D5, D7 on the Wemos board, we will also use a light-dependent resistor whose values are determined by analog to digital pins A0 is measured. Make the connections according to the table and schematic below.
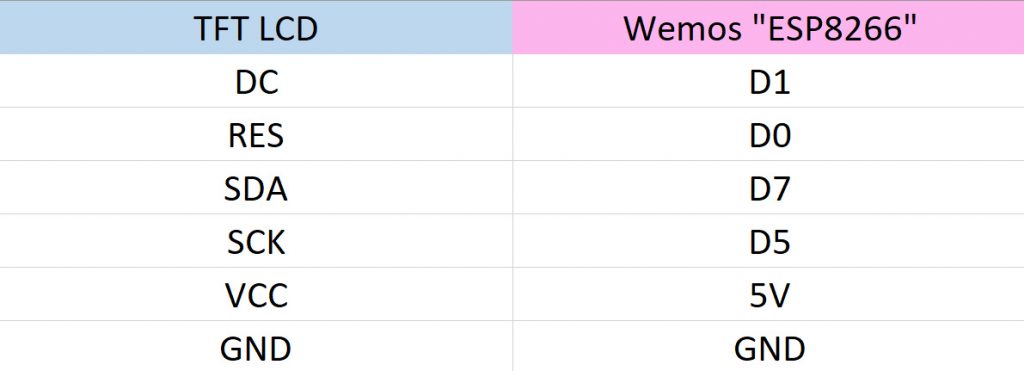
- Schematic of TFT LCD monitor connections and Wemos board
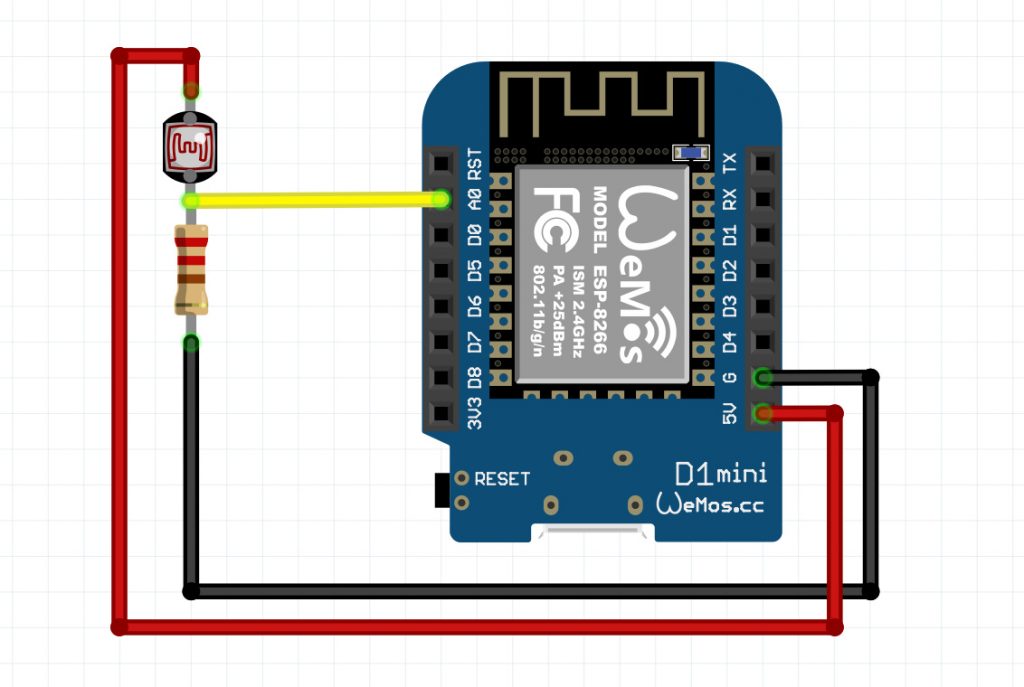
Up to this point, we have been able to capture the animation of the eye on the screen. When the light is low, the pupil opens and the pupil becomes smaller when a lot of light is detected. In this added circuit we used two types of resistors, one is a normal resistor and the other is a light dependent resistor or LDR that will be connected to pin A0 on the Wemos board.

In this section, we came to the code of this project, which has several different sections, in fact, it is defined from several different tabs for different functions, which you can see only the first page in this section. Download the full code from my GitHub page at this link.
|
1 2 3 4 5 6 7 8 9 10 11 12 13 14 15 16 17 18 19 20 21 22 23 24 25 26 27 28 29 30 31 32 33 34 35 36 37 38 39 40 41 42 43 44 45 46 47 48 49 50 51 52 53 54 55 56 57 58 59 60 61 62 63 64 65 66 67 68 69 70 71 72 73 74 75 76 77 78 79 80 81 82 83 84 85 86 87 88 89 90 91 92 93 94 95 96 97 98 99 100 101 102 103 |
//اضافه کردن کتابخانه ها #include <SPI.h> #include <TFT_eSPI.h> TFT_eSPI tft; // برای استفاده از دو عدد صفحه نمایش // بافر برای رندر کردن هر پیکسل #define BUFFER_SIZE 1024 // 128 به 1024 #ifdef USE_DMA #define BUFFERS 2 #else #define BUFFERS 1 #endif uint16_t pbuffer[BUFFERS][BUFFER_SIZE]; // رندر کردن پیکسل bool dmaBuf = 0; // DMA بافر // This struct is populated in config.h typedef struct { int8_t select; int8_t wink; uint8_t rotation; int16_t xposition; } eyeInfo_t; #include "config.h" extern void user_setup(void); extern void user_loop(void); #define SCREEN_X_START 0 #define SCREEN_X_END SCREEN_WIDTH // عرض چشم ها #define SCREEN_Y_START 0 #define SCREEN_Y_END SCREEN_HEIGHT // ارتفاع نمایشی چشم // مقادیری برای کنترل پلک زدن #define NOBLINK 0 #define ENBLINK 1 #define DEBLINK 2 typedef struct { uint8_t state; uint32_t duration; uint32_t startTime; } eyeBlink; struct { int16_t tft_cs; eyeBlink blink; int16_t xposition; } eye[NUM_EYES]; uint32_t startTime; void setup(void) { Serial.begin(115200); Serial.println("Starting"); #if defined(DISPLAY_BACKLIGHT) && (DISPLAY_BACKLIGHT >= 0) Serial.println("Backlight turned off"); pinMode(DISPLAY_BACKLIGHT, OUTPUT); digitalWrite(DISPLAY_BACKLIGHT, LOW); #endif user_setup(); initEyes(); Serial.println("Initialising displays"); tft.init(); #ifdef USE_DMA tft.initDMA(); #endif digitalWrite(eye[0].tft_cs, HIGH); if (NUM_EYES > 1) digitalWrite(eye[1].tft_cs, HIGH); for (uint8_t e = 0; e < NUM_EYES; e++) { digitalWrite(eye[e].tft_cs, LOW); tft.setRotation(eyeInfo[e].rotation); tft.fillScreen(TFT_BLACK); digitalWrite(eye[e].tft_cs, HIGH); } #if defined(DISPLAY_BACKLIGHT) && (DISPLAY_BACKLIGHT >= 0) Serial.println("Backlight now on!"); analogWrite(DISPLAY_BACKLIGHT, BACKLIGHT_MAX); #endif startTime = millis(); } void loop() { updateEye(); } |
Conclusion
In this tutorial, we used the ESP8266 board to render and display an animation on the ST7789 display. In cases where this type of project is available on the Internet, images are always used to render images from powerful boards such as Teency. And I coded, I managed to run this project on this popular chip, ESP8266, this project can be used for the appearance of humanoid robots, this project will provide us with various capabilities to control eye movement, which if welcomed Training in these cases will also be taught.
