
is there traffic on your network when you are not using it? Or what information does this traffic have, the answer to these needs will all be met with an interesting and practical device called Packet Monitor. It is a computer program or hardware, which can record the traffic that passes through the computer network or part of the network. When data flows through the network. Analyzers can store each packet and decrypt raw packet data if needed. In this project, we will build a PacketMonitor device with ESP8266 board. We will receive the traffic in each channel and then display it graphically in graphs using the OLED display. Visit CiferTech for more tutorials, and be sure to follow my Instagram page to support me.
Wemos (ESP8266)
Wemos board is one of the most popular boards used in the field of iot, one of the advantages of this board compared to boards such as Node MCU is its small size. The Wi-Fi chip used in this board is ESP8266. Another advantage of this board is the existence of different shields for this board, which makes any project very easy and enjoyable for the user, shields such as battery shield, multi sensor, DHT22, relay, oled, a large number The shield has been developed for this board, which will leave you with a good iot experience.
Oled SSD1306 display
OLED displays are commonly used in IoT and other embedded projects to display text and different amounts. These modules come in a variety of sizes depending on the size of the driver, one of the most popular being the SSD1306 This type of OLED is usually made in the sizes of 0.96 and 1.3 inches. The light emitting diode (OLED) display that we will use in this tutorial is the SSD1306, a 0.96-inch monochrome display with 128.64 pixels as shown in the figure below. The OLED display does not require backlighting, which results in a very good contrast in dark environments. Also, its pixels consume energy only when turned on, so the OLED screen consumes less power than other monitors.
How PacketMonitor works?!
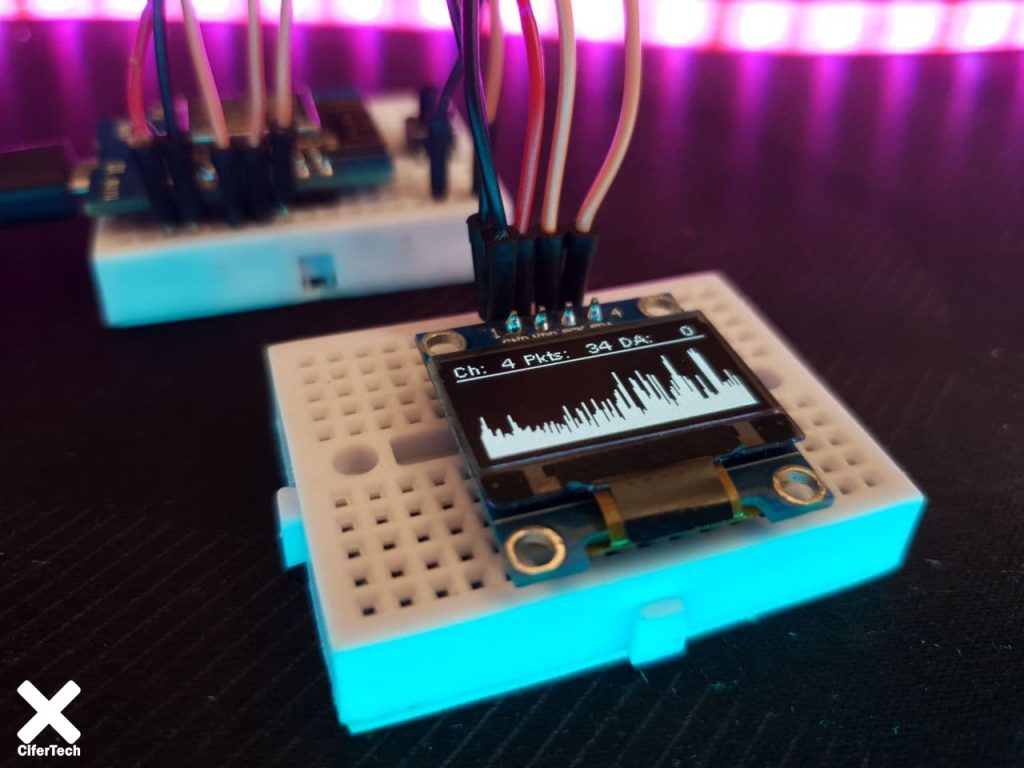
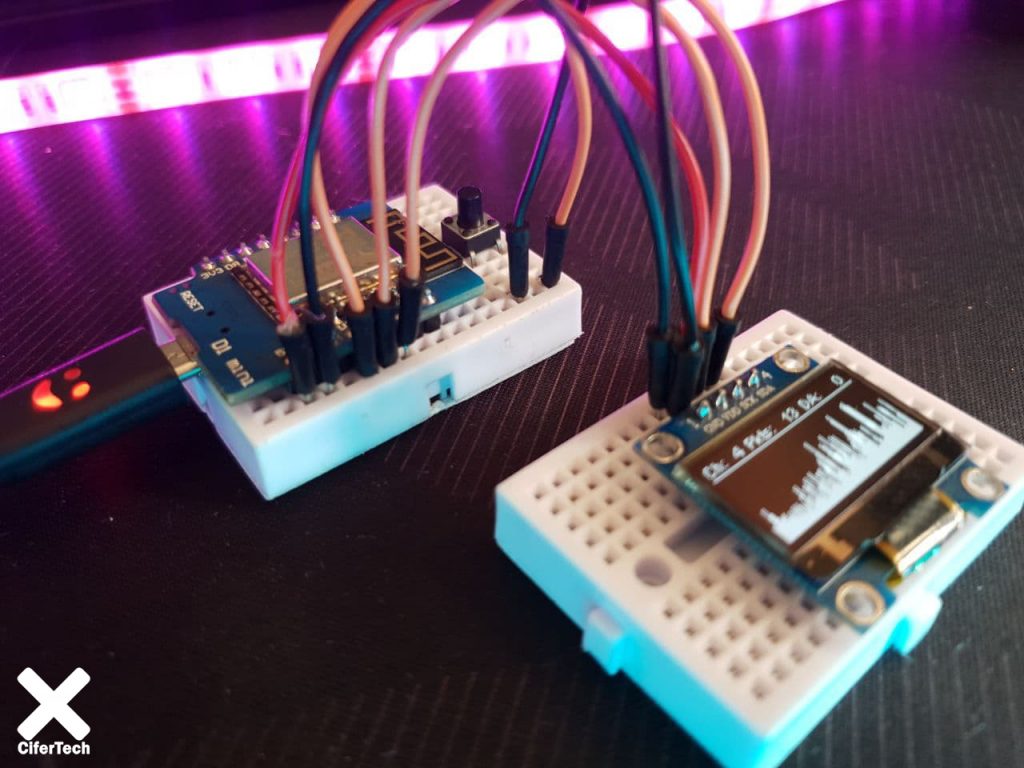
In this project, the traffic values in the channel specified from 1 to 14 are received with the help of ESP8266 WiFi board and Wemos boot board, and in the Oled display, which is driven by the i2c interface, graphically in the form of incoming traffic at any time. is shown. We will also be notified if there is a malfunction or deauth attack on the channel in question. We will also be able to change the channel number being analyzed using the key attached to pin D3 on the Wemos board.
Items needed
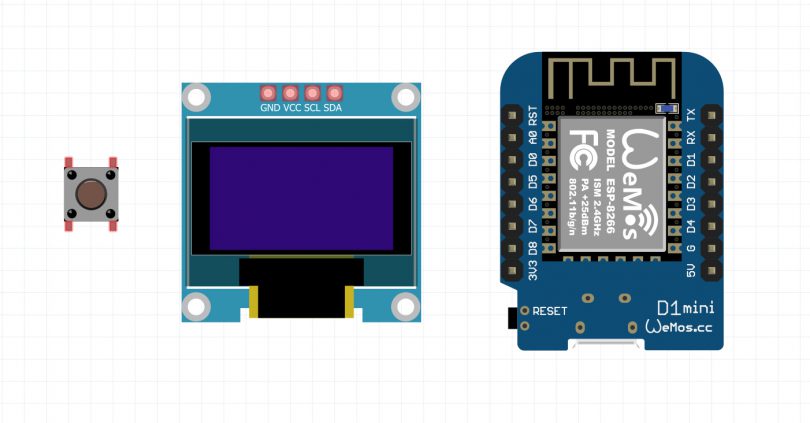
- wemos (ESP8266)
- Oled display
- Micro switch
Library required
In this tutorial we will use the ssd1306 library, follow the steps below to install the library.
- Follow this path Sketch > Include Library > Manage Libraries
- Search for ssd1306.
- Install the library.
Schematic and circuit setup
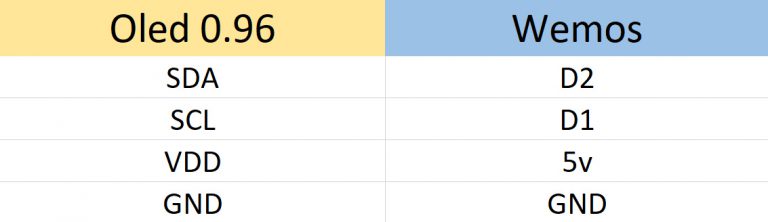
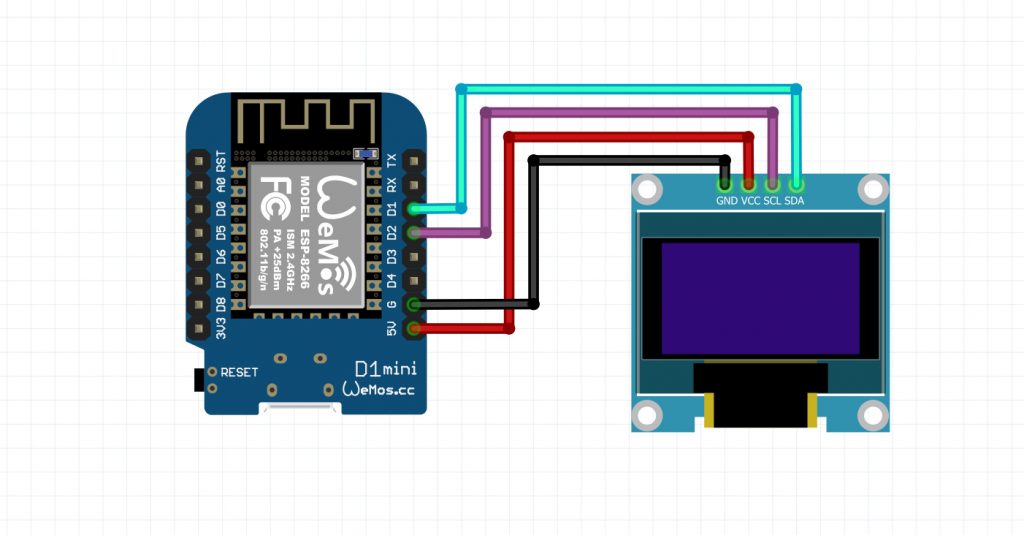
In this project, we used an OLED display with SSD1306 driver, which uses the i2c interface to communicate with our Wemos board, which is based on ESP8266. We will use two pins D1, D2 to connect the monitor to the driver board, we will also use 5v and GND pins to power the monitor. Make the connections according to the schematic and the table below.
-
Schematic of Wemos board connections and Oled display
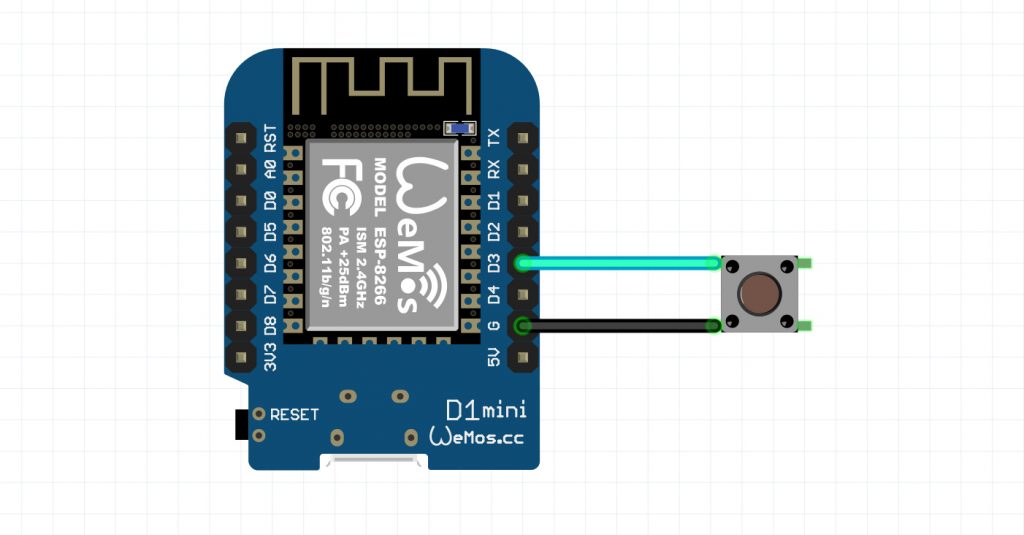
In the next part of the connections, we need to connect a microswitch to the wemos board to command the board to change the values of the network channel. For this view, we use GPIO pin 0 on the ESP8266 chip or pin D3 on the Wemos board. Another microswitch pin is connected to the GND pin to determine the logic level. Make the connections in this section with the help of the table and schematic below.

-
Schematic of Wemos board and microswitch connections
In the final part to start the project, it is time for the code of this Packet Monitor. In this code, we used the SSD1306 library to launch the OLED and display the values on the screen.
|
1 2 3 4 5 |
#include <ESP8266WiFi.h> #include <Wire.h> #include <EEPROM.h> #include "SSD1306.h" |
It can be said that one of the most important parts of the code of this part is that WiFi is set up to perform related operations.
|
1 2 3 4 5 6 |
wifi_set_opmode(STATION_MODE); wifi_promiscuous_enable(0); WiFi.disconnect(); wifi_set_promiscuous_rx_cb(sniffer); wifi_set_channel(curChannel); wifi_promiscuous_enable(1); |
Complete project code of PacketMonitor device with ESP8266 board and Oled display
|
1 2 3 4 5 6 7 8 9 10 11 12 13 14 15 16 17 18 19 20 21 22 23 24 25 26 27 28 29 30 31 32 33 34 35 36 37 38 39 40 41 42 43 44 45 46 47 48 49 50 51 52 53 54 55 56 57 58 59 60 61 62 63 64 65 66 67 68 69 70 71 72 73 74 75 76 77 78 79 80 81 82 83 84 85 86 87 88 89 90 91 92 93 94 95 96 97 98 99 100 101 102 103 104 105 106 107 108 109 110 111 112 113 114 115 116 117 118 119 120 121 122 123 124 125 126 127 128 129 130 131 132 133 134 135 136 137 138 139 140 141 142 143 144 145 146 147 148 149 150 151 152 153 154 155 156 157 158 159 160 161 162 |
#include <ESP8266WiFi.h> #include <Wire.h> #include <EEPROM.h> #include "SSD1306.h" extern "C" { #include "user_interface.h" } SSD1306 display(0x3c, 5, 4); // GPIO 5 = D1, GPIO 4 = D2 پین های مربوط #define btn D3 // GPIO 0 = پین Flash در برد های Nodemcu #define maxCh 13 // US = 11, EU = 13, Japan = 14 حداکثر تعداد چنل در استاندارد های متفاو #define ledPin 2 // پین LED #define packetRate 5 // پکت ها قبل شناسایی شدن به عنوان حمله #define flipDisplay true #define minRow 0 #define maxRow 127 #define minLine 0 #define maxLine 63 #define Row1 0 #define Row2 30 #define Row3 35 #define Row4 80 #define Row5 85 #define Row6 125 #define LineText 0 #define Line 12 #define LineVal 47 unsigned long prevTime = 0; unsigned long curTime = 0; unsigned long pkts = 0; unsigned long no_deauths = 0; unsigned long deauths = 0; int curChannel = 1; unsigned long maxVal = 0; double multiplicator = 0.0; bool canBtnPress = true; unsigned int val[128]; void sniffer(uint8_t *buf, uint16_t len) { pkts++; if (buf[12] == 0xA0 || buf[12] == 0xC0) { deauths++; } } void getMultiplicator() { maxVal = 1; for (int i = 0; i < maxRow; i++) { if (val[i] > maxVal) maxVal = val[i]; } if (maxVal > LineVal) multiplicator = (double)LineVal / (double)maxVal; else multiplicator = 1; } void setup() { display.init(); if (flipDisplay) display.flipScreenVertically(); Serial.begin(115200); EEPROM.begin(4096); curChannel = EEPROM.read(2000); if (curChannel < 1 || curChannel > maxCh) { curChannel = 1; EEPROM.write(2000, curChannel); EEPROM.commit(); } pinMode(ledPin, OUTPUT); wifi_set_opmode(STATION_MODE); wifi_promiscuous_enable(0); WiFi.disconnect(); wifi_set_promiscuous_rx_cb(sniffer); wifi_set_channel(curChannel); wifi_promiscuous_enable(1); Serial.println("starting!"); } void loop() { curTime = millis(); if (digitalRead(btn) == LOW) { if (canBtnPress) canBtnPress = false; } else if (!canBtnPress) { canBtnPress = true; curChannel++; if (curChannel > maxCh) curChannel = 1; wifi_set_channel(curChannel); for (int i = 0; i < maxRow; i++) val[i] = 0; pkts = 0; multiplicator = 1; EEPROM.write(2000, curChannel); EEPROM.commit(); if (pkts == 0) pkts = deauths; no_deauths = pkts - deauths; display.clear(); display.drawLine(minRow, Line, maxRow, Line); display.setTextAlignment(TEXT_ALIGN_LEFT); display.drawString(Row1, LineText, "Ch:"); display.drawString(Row3, LineText, "Pkts:"); display.drawString(Row5, LineText, "DA:"); display.setTextAlignment(TEXT_ALIGN_RIGHT); display.drawString(Row2, LineText, (String)curChannel); display.drawString(Row4, LineText, (String)no_deauths); display.drawString(Row6, LineText, (String)deauths); for (int i = 0; i < maxRow; i++) display.drawLine(i, maxLine, i, maxLine - val[i]*multiplicator); display.display(); } if (curTime - prevTime >= 1000) { prevTime = curTime; for (int i = 0; i < maxRow; i++) { val[i] = val[i + 1]; } val[127] = pkts; getMultiplicator(); if (deauths > packetRate) digitalWrite(ledPin, LOW); else digitalWrite(ledPin, HIGH); if (pkts == 0) pkts = deauths; no_deauths = pkts - deauths; display.clear(); display.drawLine(minRow, Line, maxRow, Line); display.setTextAlignment(TEXT_ALIGN_LEFT); display.drawString(Row1, LineText, "Ch:"); display.drawString(Row3, LineText, "Pkts:"); display.drawString(Row5, LineText, "DA:"); display.setTextAlignment(TEXT_ALIGN_RIGHT); display.drawString(Row2, LineText, (String)curChannel); display.drawString(Row4, LineText, (String)no_deauths); display.drawString(Row6, LineText, (String)deauths); for (int i = 0; i < maxRow; i++) display.drawLine(i, maxLine, i, maxLine - val[i]*multiplicator); display.display(); deauths = 0; pkts = 0; } } |
Conclusion
In this project, we were able to measure the amount of network traffic in 14 standard channels separately. The user will also be notified in the event of a Deauth attack. All values will be displayed graphically on the OLED display. And using the microswitch, we will be able to change the channel.
- Thanks to Spacehuhn’s for providing the code for this project, go check out his website with awesome content.