
The Neopixel LED module has many attractive features. With a microcontroller base, they can produce millions of different lights. In this tutorial, we are going to change the status of the neopixel LED according to the required colors with the help of the rotary encoder module and Arduino board. In this way, by changing the rotary angle of the encoder in each step, the status of the neopixel LED will also change. Visit CiferTech for more tutorials, and be sure to follow my Instagram page to support me.
Rotary encoder module
The rotary encoder is a type of position sensor used to determine the angular position of the rotating shaft. Which produces an electrical signal, analog or digital, concerning rotational motion. Due to its robust digital power and control, many projects, including robotics, CNC machines, and printers, use an encoder rotary module. Encoders are available in both absolute and incremental types. The absolute encoder gives us the exact position of the button in degrees, while the incremental encoder reports how many shafts it has moved. Rotary encoders are the digital equivalent of modern potentiometers. They can rotate completely without stopping at the end, while a potentiometer can rotate only about 3/4 of a circle. Inside the encoder, a slotted disc is connected to the common ground pin C and two contact pins A and B, as shown below. When you turn the knob, A and B make contact with the common ground pin C, depending on the direction in which you are turning the knob.

Finally, they generate a signal by contacting common points. These signals are transmitted by contacting one pin before the other pin 90 degrees out of phase. This encoding is called quadrature. When you turn the knob clockwise, pin A first connect, then pin B connects. When you turn the knob counterclockwise, pin B is attached first, and then pin A will be attached.

Arduino board
The Arduino board is one of the most popular development boards among embedded engineers. They are available in various models such as Micro, pro mini, Nano, Uno, and also Mega. The core of these popular boards consists of the AtMega328 series. Arduino is an open-source hardware and software platform. As mentioned earlier, the Arduino platform includes an open-source single-board microcontroller that forms part of the Arduino hardware. In addition, the Arduino platform includes an Arduino IDE software designed for programming for Arduino boards and a software bootloader that loads on the microcontroller.
Neopixel LED module
Neopixel LEDs are a separate addressable type all on a string that can be controlled from a stand on the microcontroller. This means that a stand can control all the colors of the LEDs and which LEDs are on at any given time. Compared to a regular RGB LED, you will notice that we need 3 pins to control the amount of Red, Green, and Blue, and all LEDs must be on or off. As you can see, using separate addressing can help create some interesting effects. Many companies sell addressable LED strips, but the most popular is neopixel LEDs.Made by Adafruit. Adafruit produces an addressable LED strip line. They have also developed a library to control them, called the Adafruit NeoPixel. Other companies have developed libraries to control these addressable LEDs. However, in my opinion, Adafruits has the best support and is a good choice to start with.
Additional explanation
In the neopixel LED control project, by specifying the values of R, G, and B in the project code, the neopixel status will change by moving each step of the rotary encoder module. In this way, each step of the encoder represents a case in the project code. Each case comes with certain values, which are displayed by changing the status of the encoder. Take a look at the image below.

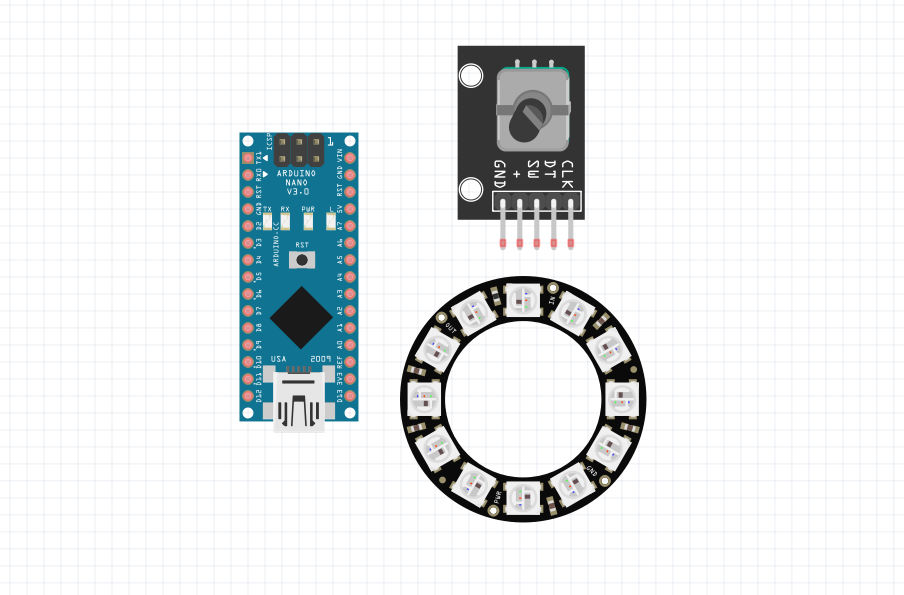
Items needed
Rotary Encoder
Arduino Nano board
Neopixel LED ring
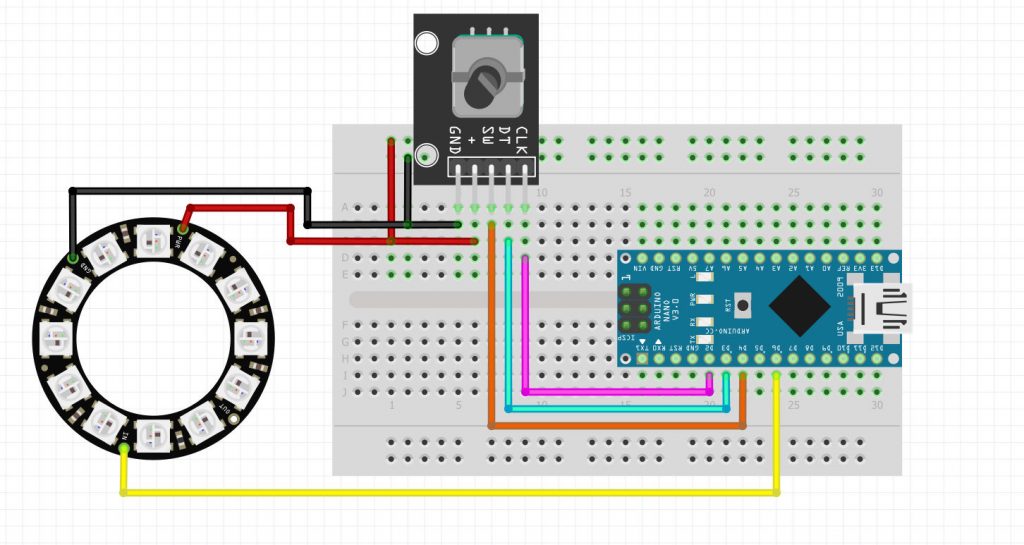
Schematics and connections
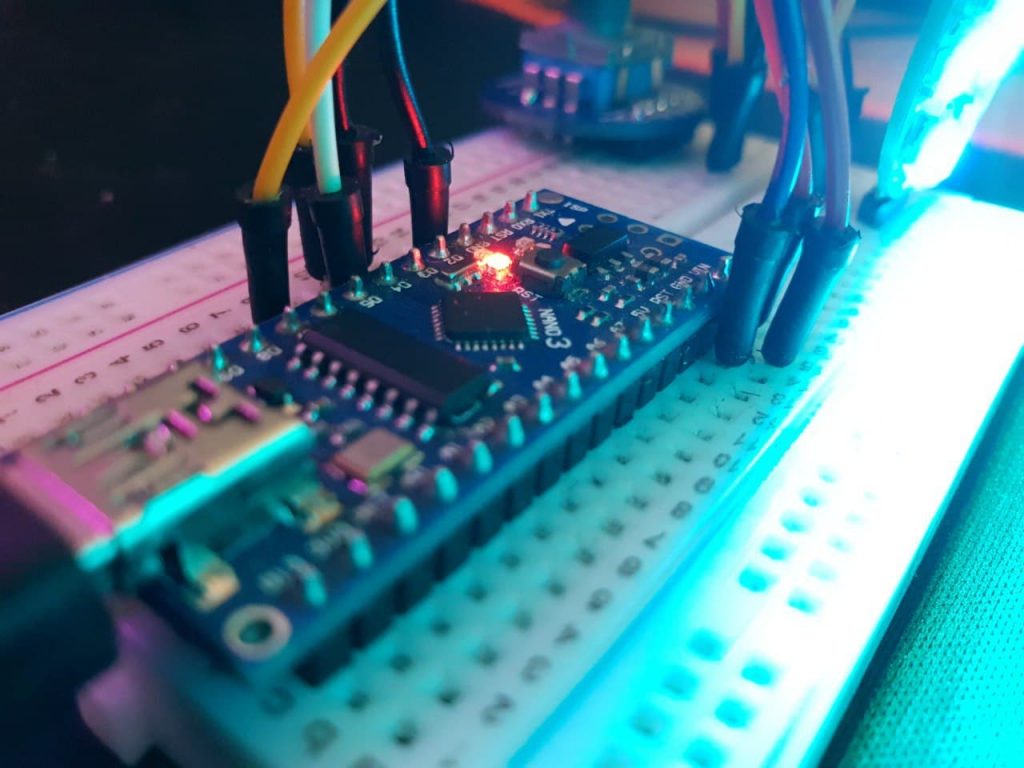
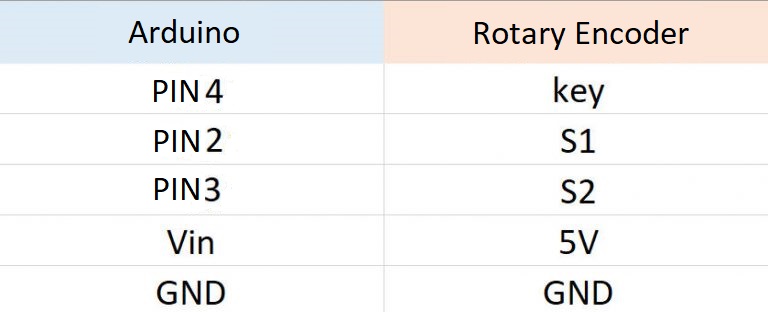
First, make the connections for the encoder module as well as the neopixel module. Pins 2 on the Arduino connect to S1 and S2 on the rotary encoder. Also, pin 4 on the Arduino connects to the input of the rotary switch. Then pin 6 on the Arduino connects to the neopixel data input. Both modules are powered by 5 volts.
- Encoder and Arduino rotary module connections.
- Neopixel and Arduino ring module connections.

Schematic of connections related to neopixel LED control training with Rotary Encoder and Arduino
Setup and coding
At this stage, after establishing the connections, it will be the turn of the codes of this project. We will review the different parts of the code step by step. We will first call the libraries needed to launch the neopixel module.
|
1 |
#include <Adafruit_NeoPixel.h> |
In this section, we create three variables for the three primary colors in neopixels.
|
1 |
int R = 0; int G = 0; int B = 0; |
Also, these three variables are related to the rotary module, which we have specified the pins related to each base.
|
1 2 3 |
const int buttonPin = 4; const int PinA = 2; const int PinB = 3; |
In this section, apart from the void loop and void setup, we have created another void that is related to Intrapt.
|
1 2 3 4 5 6 7 8 9 10 11 12 13 14 15 16 17 18 |
void time () { static unsigned long lastInterruptTime = 0; unsigned long interruptTime = millis(); if (interruptTime - lastInterruptTime > 20) { if (digitalRead(PinB) == LOW) { virtualPosition-- ; } else { virtualPosition++ ; } lastInterruptTime = interruptTime; } } |
Finally, this section is about the existing states for neopixels, which you can change as needed.
|
1 2 3 4 5 6 7 8 9 10 11 12 13 14 15 16 17 18 19 20 21 22 23 24 25 26 27 28 29 30 31 |
case 6: R = 255; G = 0; B = 0; break; case 7: R = 255; G = 0; B = 51; break; case 8: R = 255; G = 0; B = 102; break; case 9: R = 255; G = 0; B = 153; break; case 10: R = 255; G = 0; B = 204; break; case 11: R = 255; G = 0; B = 255; break; case 12: R = 204; G = 0; B = 255; break; case 13: R = 153; G = 0; B = 255; break; case 14: R = 102; G = 0; B = 255; break; case 15: R = 51; G = 0; B = 255; break; case 16: R = 0; G = 0; B = 255; break; case 17: R = 0; G = 51; B = 255; break; case 18: R = 0; G = 102; B = 255; break; case 19: R = 0; G = 153; B = 255; break; case 20: R = 0; G = 204; B = 255; break; case 21: R = 0; G = 255; B = 255; break; case 22: R = 0; G = 255; B = 204; break; case 23: R = 0; G = 255; B = 153; break; case 24: R = 0; G = 255; B = 102; break; case 25: R = 0; G = 255; B = 51; break; case 26: R = 0; G = 255; B = 0; break; case 27: R = 51; G = 255; B = 0; break; case 28: R = 102; G = 255; B = 0; break; case 29: R = 153; G = 255; B = 0; break; case 30: R = 204; G = 255; B = 0; break; case 31: R = 255; G = 255; B = 0; break; case 32: R = 255; G = 204; B = 0; break; case 33: R = 255; G = 153; B = 0; break; case 34: R = 255; G = 102; B = 0; break; case 35: R = 255; G = 51; B = 0; break; case 36: R = 255; G = 0; B = 0; break; |
Complete code of neopixel LED control project with rotary encoder and Arduino
|
1 2 3 4 5 6 7 8 9 10 11 12 13 14 15 16 17 18 19 20 21 22 23 24 25 26 27 28 29 30 31 32 33 34 35 36 37 38 39 40 41 42 43 44 45 46 47 48 49 50 51 52 53 54 55 56 57 58 59 60 61 62 63 64 65 66 67 68 69 70 71 72 73 74 75 76 77 78 79 80 81 82 83 84 85 86 87 88 89 90 91 92 93 94 95 96 97 98 99 100 101 102 103 104 105 106 107 108 109 110 111 112 113 114 115 116 117 118 119 120 121 122 123 124 125 126 127 128 129 130 131 132 133 134 135 136 137 138 139 140 141 142 143 144 145 146 147 148 149 150 151 152 153 154 155 156 157 158 159 160 161 162 163 164 165 166 167 168 169 170 171 172 173 174 175 176 177 178 179 180 181 182 183 184 185 186 187 |
#include <Adafruit_NeoPixel.h> #ifdef __AVR__ #include <avr/power.h> #endif #define PIN 6 Adafruit_NeoPixel strip = Adafruit_NeoPixel(130, 6, NEO_GRB + NEO_KHZ800); int R = 0; int G = 0; int B = 0; int OldLamp; #define BUTTON_PIN 4 const int buttonPin = 4; const int PinA = 2; const int PinB = 3; int lastCount = 0; volatile int virtualPosition = 365; int pos = 0; bool oldState = HIGH; int showType = 0; void time () { static unsigned long lastInterruptTime = 0; unsigned long interruptTime = millis(); if (interruptTime - lastInterruptTime > 20) { if (digitalRead(PinB) == LOW) { virtualPosition-- ; } else { virtualPosition++ ; } lastInterruptTime = interruptTime; } } void setup() { pinMode(BUTTON_PIN, INPUT_PULLUP); Serial.begin(9600); pinMode(PinA, INPUT); pinMode(PinB, INPUT); attachInterrupt(digitalPinToInterrupt(PinA), time, LOW); Serial.println("Start"); strip.begin(); strip.setBrightness(120); } boolean checkPos(){ if (virtualPosition != lastCount) { lastCount = virtualPosition ; pos = abs(virtualPosition % 36); Serial.println(pos); return true; } return false; } void loop() { bool newState = digitalRead(BUTTON_PIN); if (newState == LOW && oldState == HIGH) { delay(20); newState = digitalRead(BUTTON_PIN); if (newState == LOW) { showType++; if (showType > 1) showType=0; } } oldState = newState; if (showType == 0) { for (int i = 0; i < strip.numPixels(); i++) { strip.setPixelColor(i, 0, 0, 0); } strip.show(); } if (showType == 1) { checkPos(); switch(pos){ case 0: OldLamp = random(100,200); R = 250-OldLamp; G = R-40-OldLamp; B = 40-OldLamp; if(G<0) G=0; if(R<0) R=0; if(B<0) B=0; delay(random(100,150)); break; case 6: R = 255; G = 0; B = 0; break; case 7: R = 255; G = 0; B = 51; break; case 8: R = 255; G = 0; B = 102; break; case 9: R = 255; G = 0; B = 153; break; case 10: R = 255; G = 0; B = 204; break; case 11: R = 255; G = 0; B = 255; break; case 12: R = 204; G = 0; B = 255; break; case 13: R = 153; G = 0; B = 255; break; case 14: R = 102; G = 0; B = 255; break; case 15: R = 51; G = 0; B = 255; break; case 16: R = 0; G = 0; B = 255; break; case 17: R = 0; G = 51; B = 255; break; case 18: R = 0; G = 102; B = 255; break; case 19: R = 0; G = 153; B = 255; break; case 20: R = 0; G = 204; B = 255; break; case 21: R = 0; G = 255; B = 255; break; case 22: R = 0; G = 255; B = 204; break; case 23: R = 0; G = 255; B = 153; break; case 24: R = 0; G = 255; B = 102; break; case 25: R = 0; G = 255; B = 51; break; case 26: R = 0; G = 255; B = 0; break; case 27: R = 51; G = 255; B = 0; break; case 28: R = 102; G = 255; B = 0; break; case 29: R = 153; G = 255; B = 0; break; case 30: R = 204; G = 255; B = 0; break; case 31: R = 255; G = 255; B = 0; break; case 32: R = 255; G = 204; B = 0; break; case 33: R = 255; G = 153; B = 0; break; case 34: R = 255; G = 102; B = 0; break; case 35: R = 255; G = 51; B = 0; break; case 36: R = 255; G = 0; B = 0; break; default: R = 0; G = 0; B = 0; } for (int i = 0; i < strip.numPixels(); i++) { strip.setPixelColor(i, R, G, B); } strip.show(); } else { for (int i = 0; i < strip.numPixels(); i++) { strip.setPixelColor(i, 0, 0, 0); } strip.show(); } } |
Conclusion
In this tutorial, using neopixel ring modules and rotary encoder as well as Arduino nano board, we created and displayed different modes with neopixels, but you can also change the created modes according to the need.
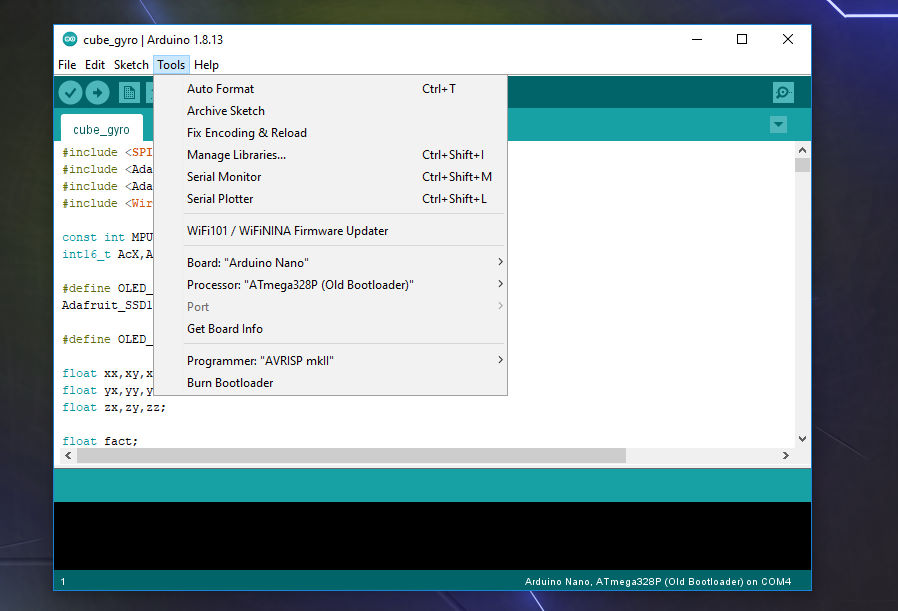
- The settings menu of the tools in Arduino software is the same as the image below.
If you encounter any problems in the process of launching and carrying out this project, do not hesitate to ask your question at the end of this post. I will answer your problem as soon as possible. Also, if there is a problem in the code or the execution steps, you can inform in this way.