

I’m Cifer, and after months of anticipation, I’m finally ready to introduce you to the ESP32DIV—an upgraded version of my original project that has been years in the making. If you’re excited about wireless tech, cybersecurity, and open-source hardware, then this is the project for you! Today, I’ll walk you through all the new features and the hardware behind this amazing device.
🔥 The ESP32DIV Evolution
The ESP32DIV project originally started a few years ago. You all loved the first version, but compared to the new iteration, that one was like a “kindergarten project.” The new version is packed with upgrades and is much more powerful. While the old version only supported Wi-Fi and BLE, the ESP32DIV now has support for 2.4GHz and Sub-GHz frequencies, expanding its capabilities beyond what we originally imagined.
You might be wondering about the name—ESP32DIV. The “ESP32” part is obvious, but “DIV” comes from Persian mythology. In Persian culture, div refers to a supernatural being or demon—powerful and often associated with chaos and evil. It’s a fitting name for a tool that disrupts and manipulates wireless signals!
🌐 Exploring the Features
Let’s dive into the features that make the ESP32DIV so special. I’ve split the functionalities into several menus, each offering a unique set of tools for wireless manipulation and analysis.
Wi-Fi Menu:
• Packet Monitor:
The Packet Monitor displays live traffic across all 14 Wi-Fi channels, visualized as a waterfall graph. This feature gives you real-time insight into what’s happening in your Wi-Fi environment.
• Beacon Spammer:
This tool sends out fake Wi-Fi access points (beacon frames) to flood the airwaves. You can use it to disrupt connections, confuse nearby devices, or even trick users into connecting to fake networks. It offers two options: one that targets specific access points with custom names, and another that generates random fake networks.
• Deauth Detector:
This feature scans for deauthentication attacks and other suspicious activity. Originally focused on detecting deauth attacks, it has evolved into a more general-purpose threat detection tool.
• Wi-Fi Scanner:
The Wi-Fi Scanner provides a full list of nearby Wi-Fi networks along with detailed information about each one. It’s perfect for network analysis or security assessments.
Bluetooth Menu:
• BLE Jammer:
The BLE Jammer floods Bluetooth Low Energy (BLE) advertising channels with noise, making it harder for devices to discover or connect to each other. It also supports classic Bluetooth channels.
• BLE Spoofer:
The BLE Spoofer mimics real BLE devices by sending fake advertising packets. You can impersonate specific devices and launch spoofing operations to test how other devices respond to fake signals.
• Sour Apple:
Designed for Apple devices, the Sour Apple tool exploits BLE features like AirDrop and Continuity. It spoofs Apple BLE advertisements to trigger unintended behaviors or potentially cause data leaks.
• BLE Scanner:
This tool scans for nearby BLE devices, even those normally hidden from your phone or laptop. You’ll receive detailed information on each device, making it great for analysis or security research.
2.4GHz Menu:
• 2.4GHz Scanner:
This scans the entire 2.4GHz spectrum across 128 channels, enabling detection of a variety of wireless protocols—not just Wi-Fi and Bluetooth. It’s especially useful for spotting Zigbee networks or proprietary RF protocols operating in the same frequency range.
• Protokill:
Protokill lets you jam different wireless protocols on the 2.4GHz band, including Zigbee and Wi-Fi. It’s perfect for stress testing protocols and conducting specific jamming operations.
Sub-GHz Menu:
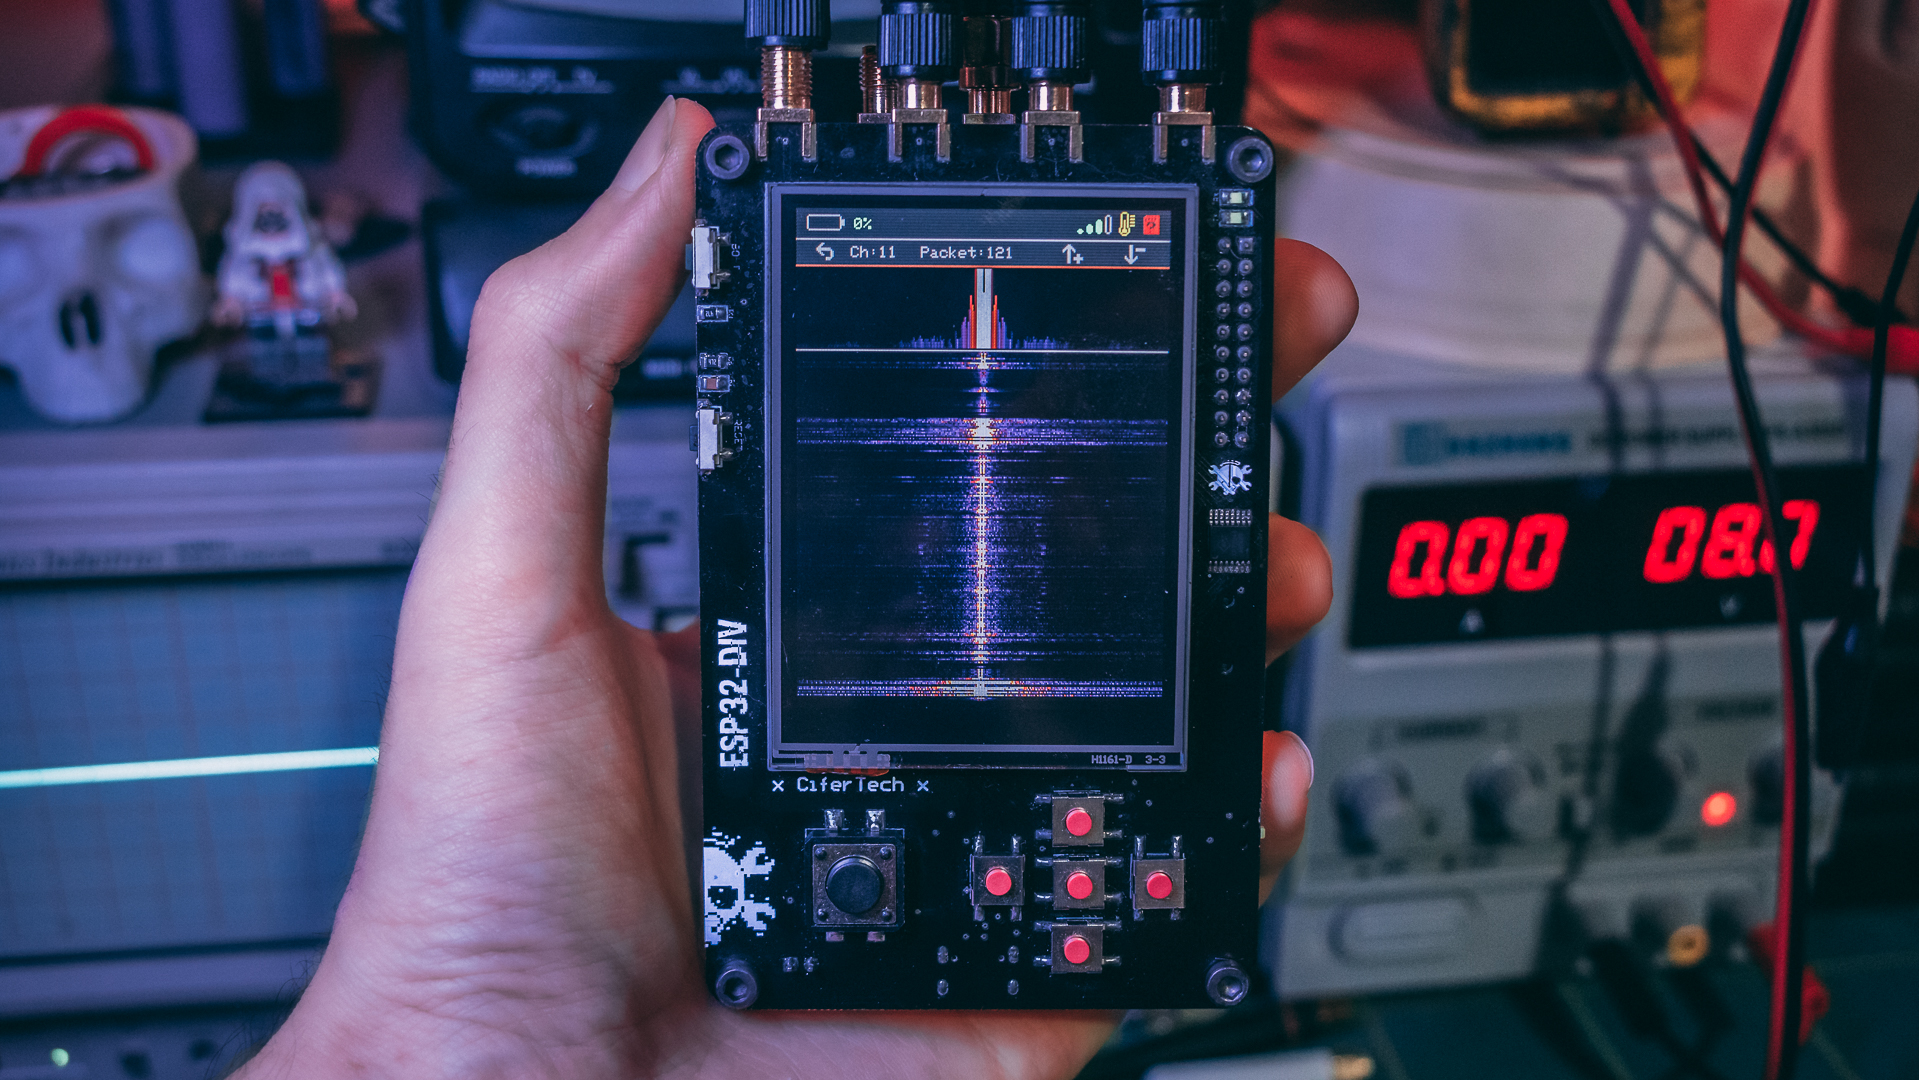
• Replay Attack:
Capture a signal (such as a door unlock command) and replay it to gain unauthorized access. This tool allows you to store and replay captured signals, visualized with a real-time waterfall graph to help you better understand the process.
• Sub-GHz Jammer:
This feature disrupts wireless communication in Sub-GHz frequencies, targeting devices like garage door openers, remote controls, and IoT sensors. You can select specific frequencies to jam or let the device automatically cycle through them.
• Saved Profiles:
This section stores all captured signals from the Replay Attack feature, allowing you to revisit them, replay frequencies, or delete profiles as needed.
🛠️ The Hardware Behind ESP32DIV
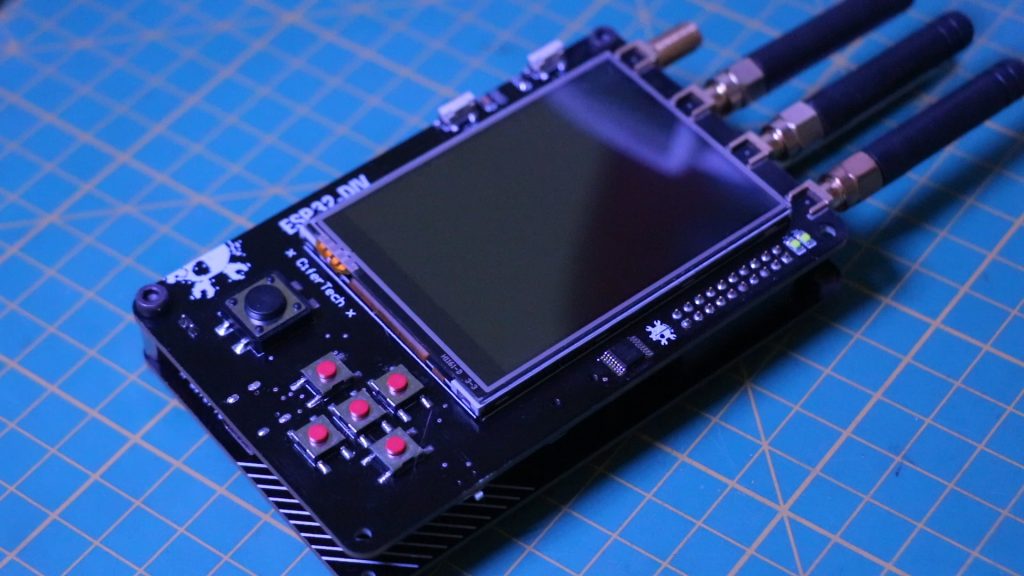
Now that you’ve seen the features, let’s take a look at the hardware. The ESP32DIV is made of two main sections: the Main Board and the Shield.
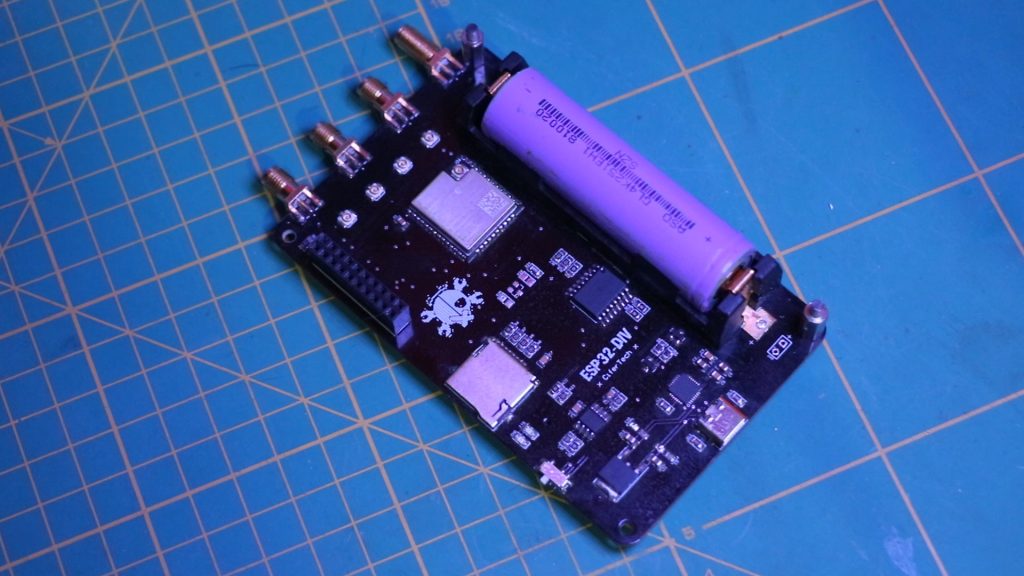
Main Board:
• LF33: A voltage regulator providing a stable 3.3V supply.
• TP4056: Lithium battery charger with protection.
• CP2102: USB-to-serial converter for flashing and communication.
• PCF8574: I/O expander for managing multiple button inputs.
• SD Card Slot: For saving captured signals, logs, and configurations.
• ESP32-U (16MB version): The core microcontroller with Wi-Fi and BLE.
• Antenna Connector: For connecting external antennas.
• ILI9341 TFT Display: A 2.8-inch screen for UI and live data.
• Push Buttons: For menu navigation.
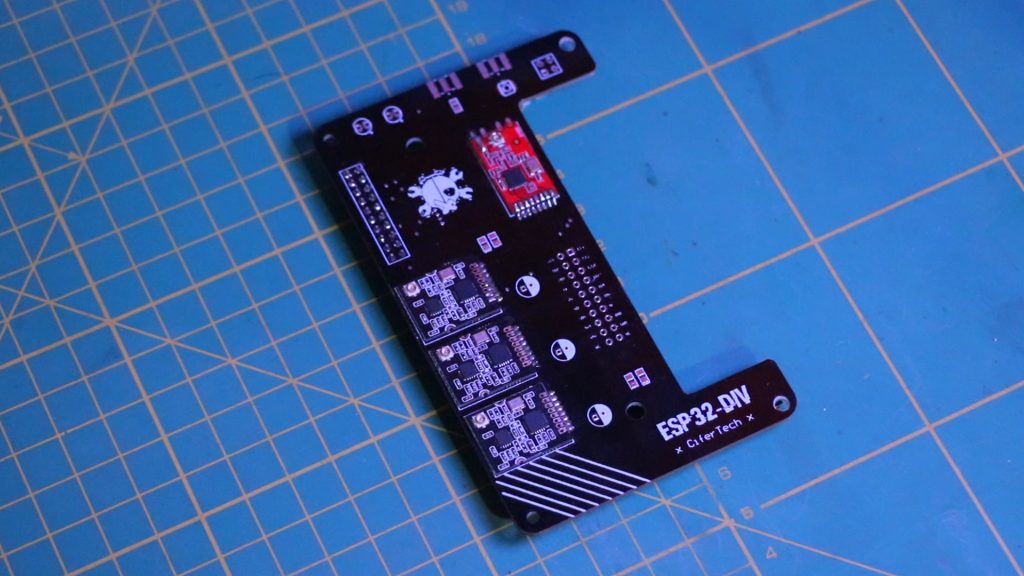
Shield:
• 3 x NRF24 Modules: For 2.4GHz operations like jamming and attacks.
• CC1101 Module: Sub-GHz transceiver for replay attacks and jamming.
⚙ Schematic
• TFT Display + ESP32
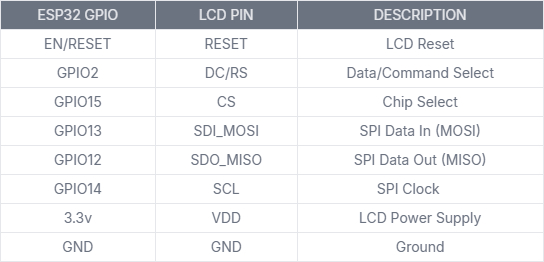
Note: LED backlight control is managed via a transistor switch (Q3, 8050), with the base controlled through a 1kΩ resistor (R26). This pin may also be PWM-controlled for brightness adjustment if needed.
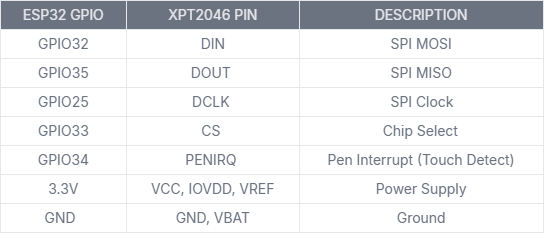
• XPT2046 + ESP32
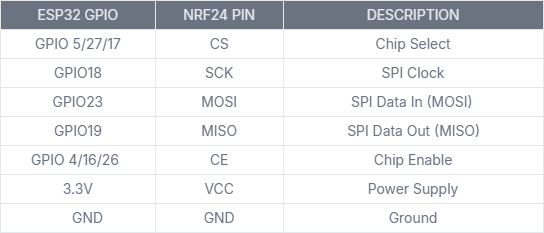
📡 NRF24 Modules – Connections to ESP32
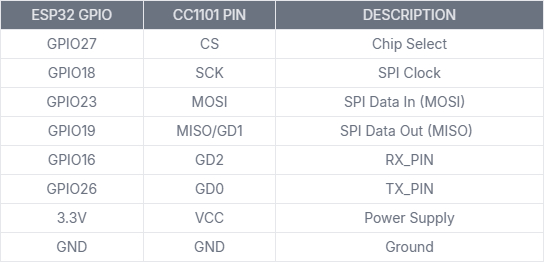
📻 CC1101 Sub-GHz Transceiver – Connections to ESP32
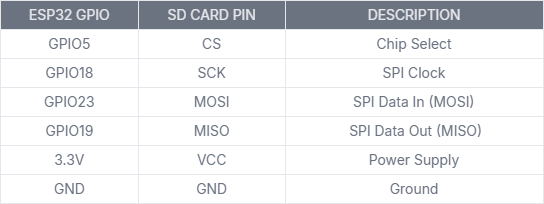
💾 SD Card – Connections to ESP32
💻 Building Your Own ESP32DIV
Building your own ESP32DIV is simple if you follow these steps:
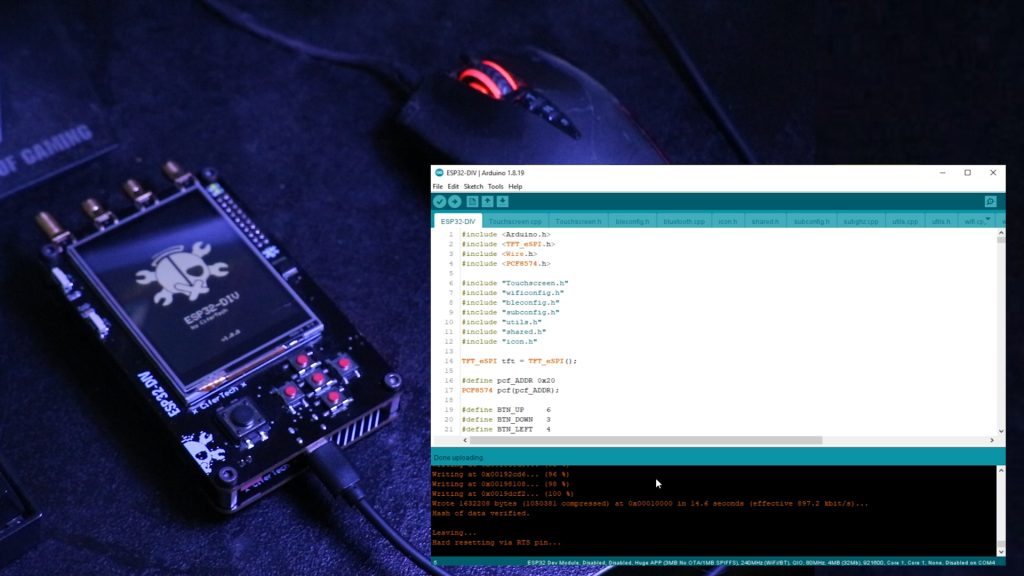
• Open Arduino IDE.
• Go to Tools > Board > ESP32 Arduino and select ‘ESP32 Dev Module’.
• Set the Partition Scheme to ‘Huge App’.
• Make sure the correct COM port is selected.
• Install ESP32 core version 2.0.11 via the Board Manager.
• Download and use the custom libraries for the TFT display from my GitHub.
• Hit ‘Upload’ and follow the instructions.
![]()
Code & PCB
If you’re interested in building this project, the code and schematic are available on GitHub. Simply visit the GitHub repository to download the necessary files. Feel free to test the code and share your feedback or improvements.
GitHub repository: github.com/cifertech/ESP32-DIV
🎬 Final Thoughts
That’s it for the ESP32DIV—for now! We’ve covered the features, hardware, and how to get started with the setup. Be sure to keep an eye out for future updates and new features coming your way.
If you’re excited about this project, don’t forget to like, comment, and subscribe so you don’t miss anything. As always, feel free to ask any questions or leave feedback in the comments below.
Until next time, keep hacking!