
Hey everyone, Cifer here!
In this post, I’m walking you through one of my latest and most experimental builds—a custom dual-microcontroller PCB that creates retro visual effects on an old-school monochrome TV. With interactive controls and wild 3D visuals, this was a fun ride from concept to soldering iron. Let’s dive in.
💡 The Idea: Old Graphics, New Brain
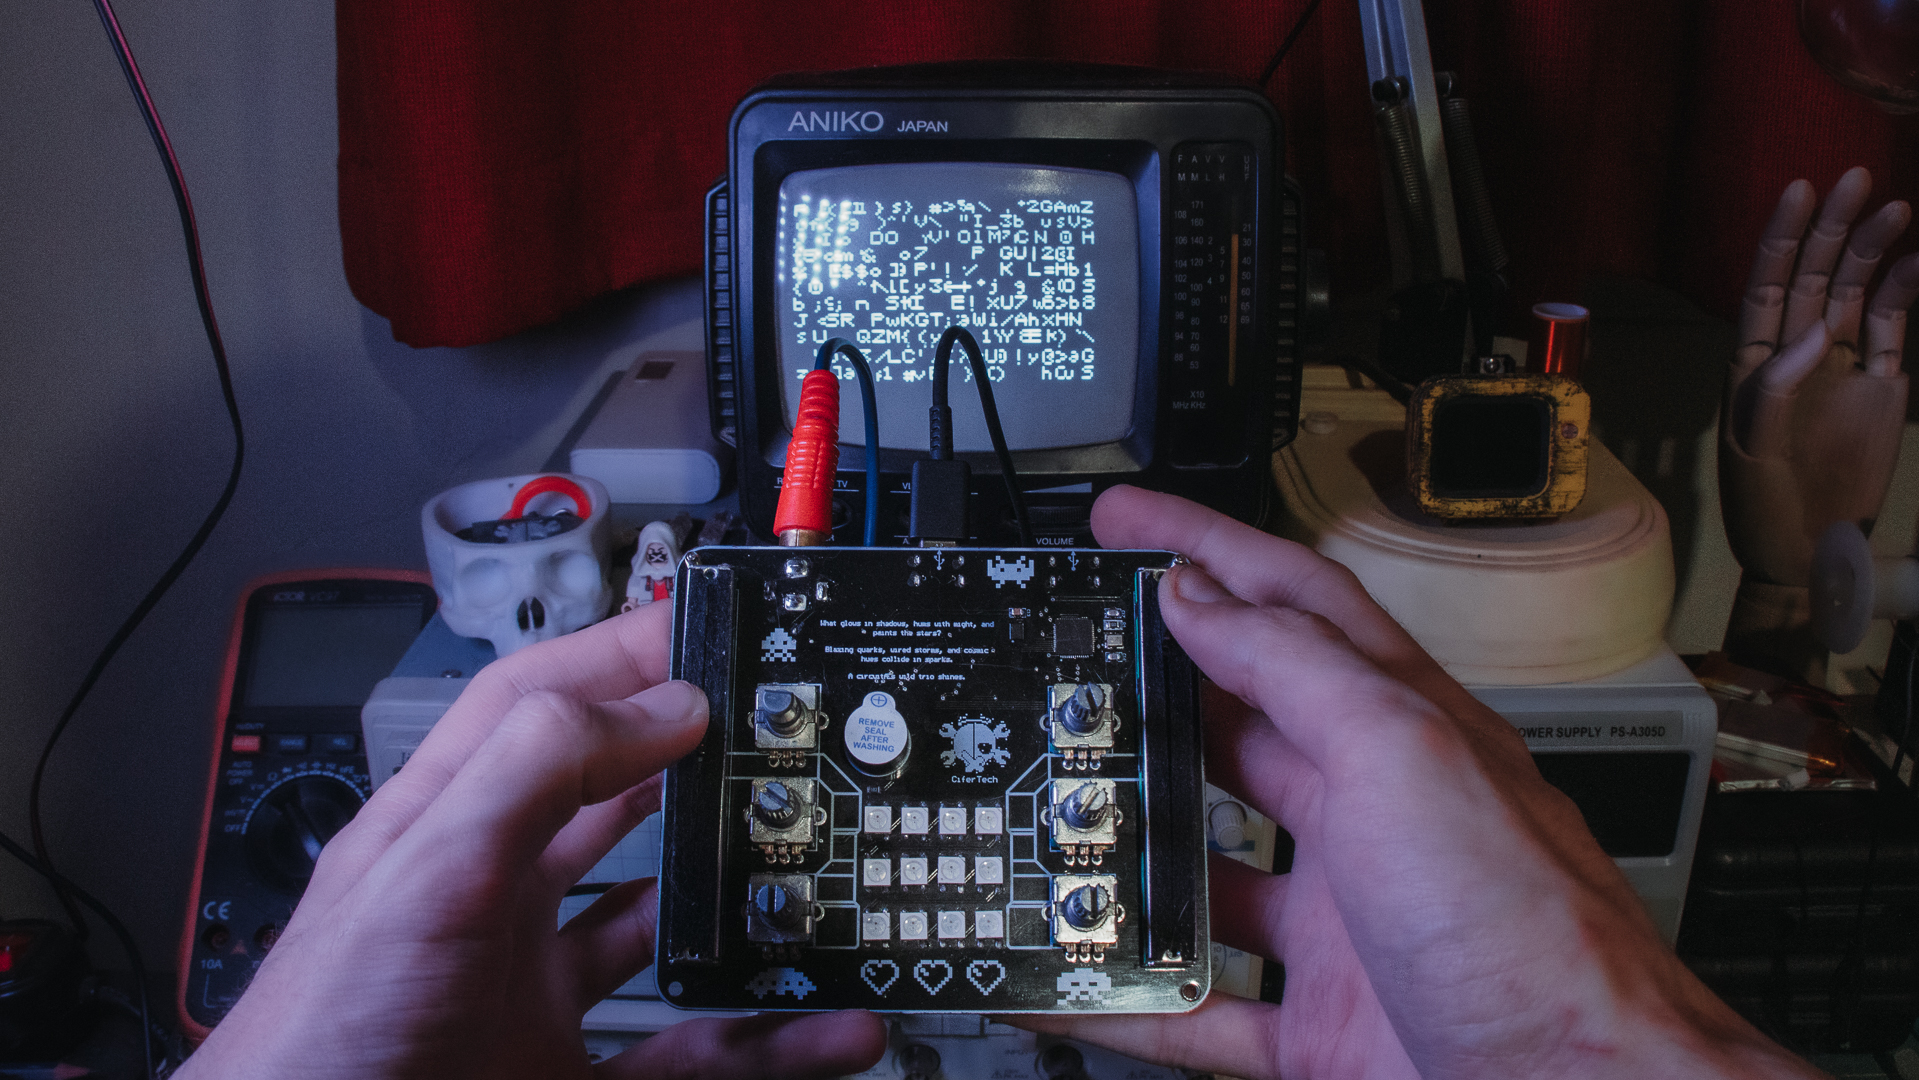
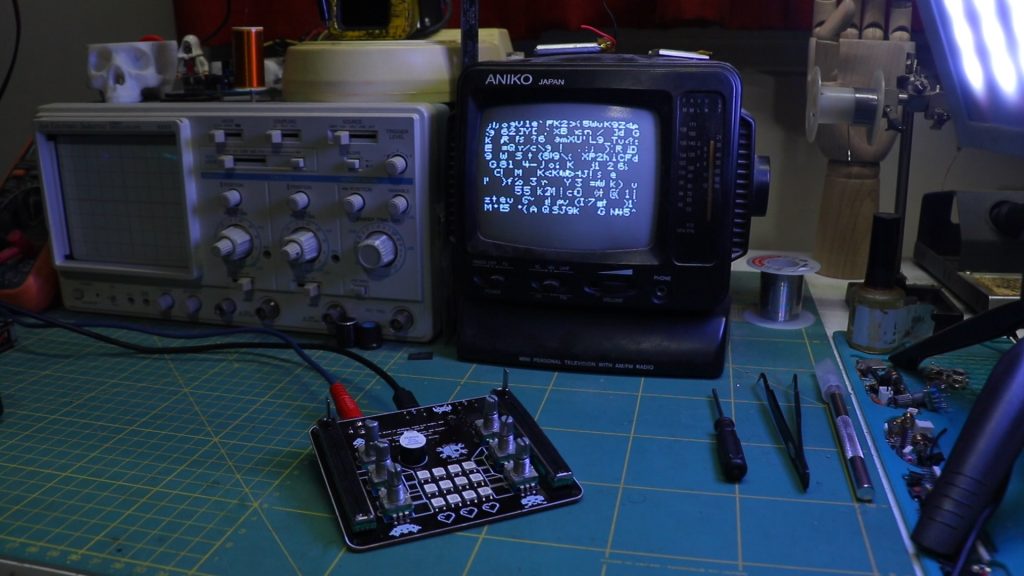
This whole thing started with a simple goal: recreate those vintage wireframe effects you’d see in old arcade games or early computers, but using modern microcontrollers. I wanted smooth tunnels, glitch cubes, and interactive visuals—all output through composite video to a CRT-style TV.
I chose the RP2040 to handle game logic and inputs. But here’s the trick: the TVout library that outputs composite video works best on the ATmega32U4. So I paired them. The RP2040 does the heavy lifting, and the ATmega32U4 handles the display.
🔁 Lessons from Earlier Experiments
I’ve been experimenting with RCA video output for a while. My first attempts were with an Arduino Nano—lots of flickering, lots of trial and error. Then I moved to ESP32, which gave me more power, but video output was messy. Interference from Wi-Fi and unstable power made it crash often.
Those challenges taught me some key tricks:
-
Shield RCA lines
-
Stabilize power
-
Split responsibilities between MCUs
Those lessons helped guide this final PCB design.
🧩 Dual MCU Design
Here’s how the board breaks down:
🎮 RP2040
-
Dual-core Cortex-M0+ microcontroller
-
Handles input from potentiometers and rotary encoders
-
Manages game logic and state
-
Communicates with the ATmega32U4 via Serial
📺 ATmega32U4
-
Runs TVout to output visuals through RCA to a TV
-
Receives display data from RP2040
-
Focused only on rendering
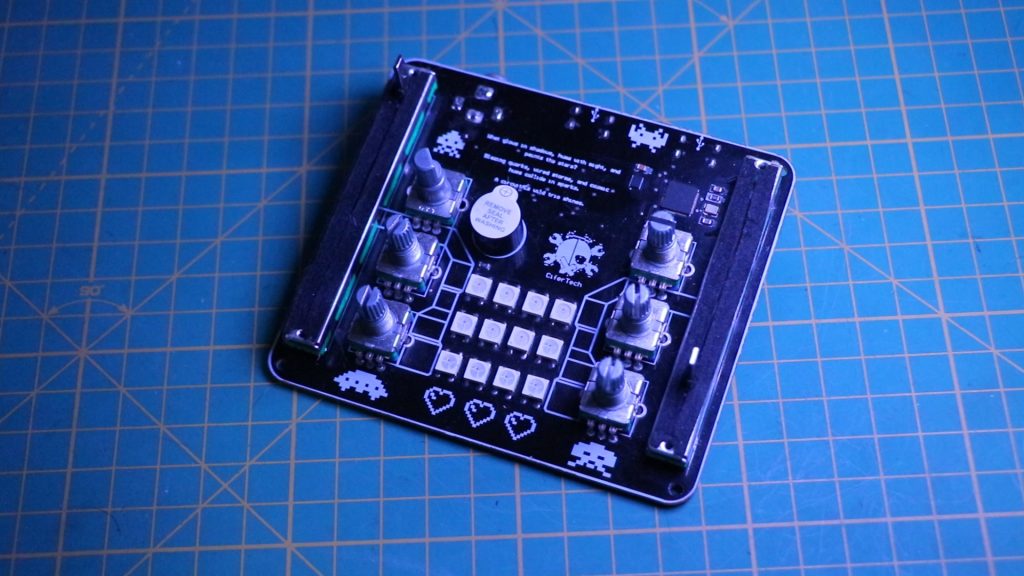
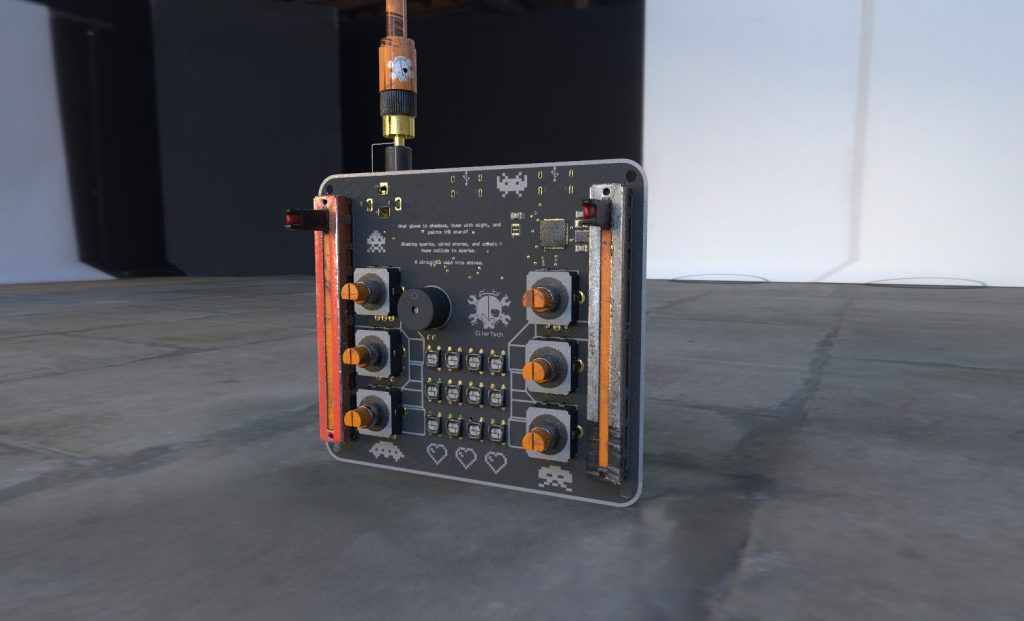
🧠 Core Components
This board includes a full range of components to deliver a fun, interactive retro experience:
-
2 Potentiometer Sliders – control vertical and horizontal movement
-
6 Rotary Encoders with Buttons – used for rotating 3D visuals, menu selection, or special actions
-
12 WS2812 NeoPixel LEDs – visual indicators for game state, health, or items
-
Buzzer – gives audio feedback for movement or interactions
-
USB Type-C Port – modern power and programming interface
-
RCA Socket – connects to any composite video input (TV, monitor, etc.)
-
Voltage Regulators – 3.3V for RP2040 and NeoPixels, 5V for ATmega32U4
-
Supporting Components – resistors, caps, buttons, decoupling, and connectors
It’s compact, interactive, and leans into that nostalgic charm while using current-gen parts.
⚙️ The Code Demos
To test everything and show off what’s possible, I created several small interactive demos:
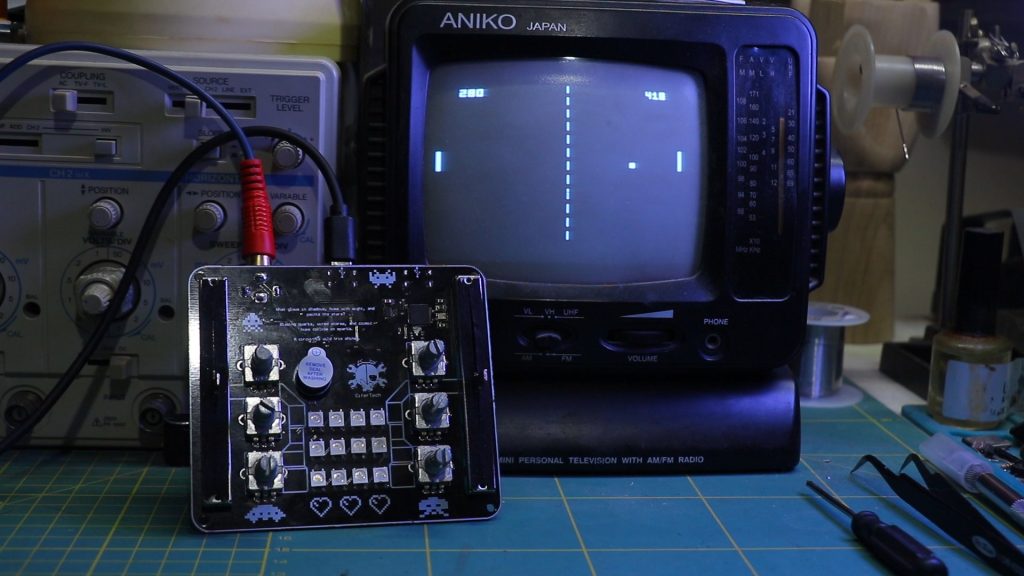
🏓 Pong
A basic two-player game where paddles are controlled by potentiometers. Ball physics handled by RP2040, displayed on TV via ATmega32U4.
💧 Code Rain
A cascade of characters flowing down the screen—Matrix-style. Adds a bit of cyberpunk flair to a retro display.
🧊 Cube Glitch
A 3D cube rendered with intentional visual distortion. Rotates, jitters, and glitches—pushing the display to its visual edge.
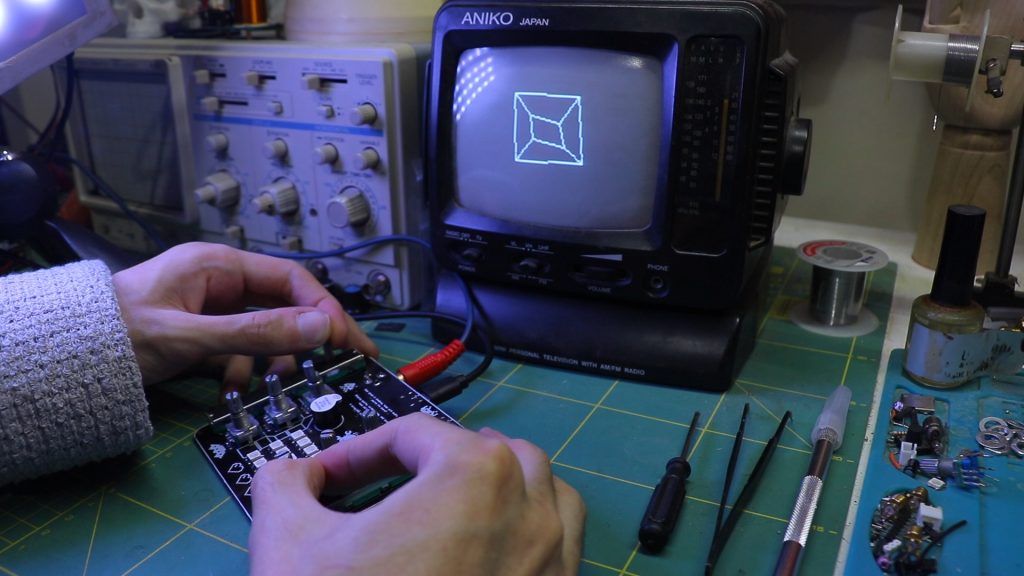
🎛️ Interactive Cube
Using the rotary encoders, you can move, scale, and rotate the cube live on screen. Adds tactile fun to the graphics.
🌊 Sine Wave Shape
A generative art sketch where sliders control amplitude and frequency of a wave drawn on screen. It’s a mix of math and minimalism.
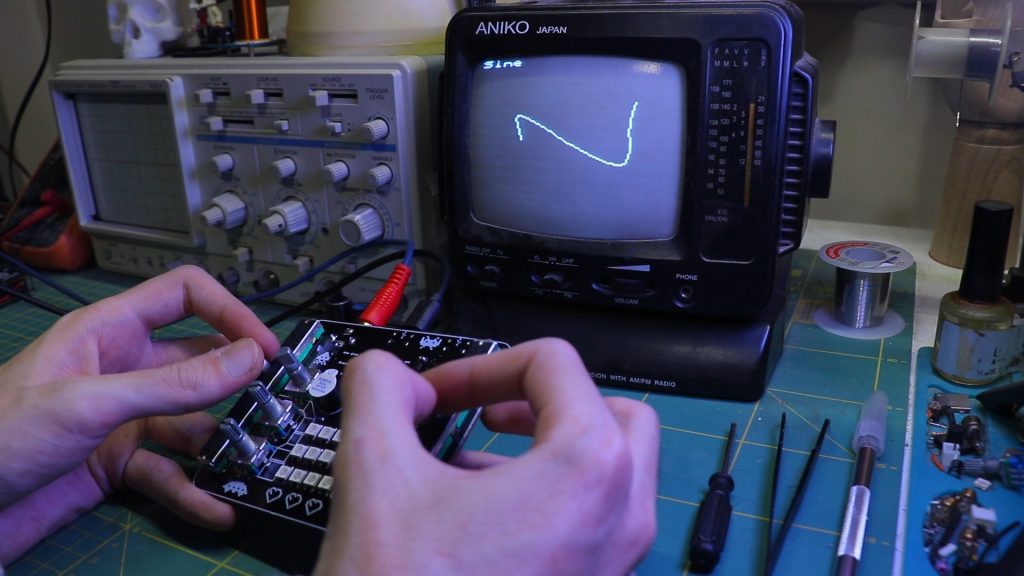
All graphics are calculated by the RP2040 and sent over to the ATmega32U4 to display using TVout. Combined with RGB lighting and sound, the whole setup becomes a retro-modern multimedia project.
🧪 What’s Next?
This project is still experimental, but I plan to evolve it into a more fully-featured NetHack-style game with expanded gameplay, enemies, and maybe even multiplayer. The platform’s already set up for it—just needs more time and code.
🧠 Wrap-Up
This build was one of those projects where past lessons really paid off. Merging modern chips with old-school displays isn’t easy, but the results are so satisfying.
If you’re into retro computing, DIY electronics, or creative microcontroller projects, I hope this gives you ideas for your next build. And if you have suggestions or want to collaborate, drop a comment or DM!
Until next time—stay curious, stay creative, and keep building.